Disconnecting hydraulic hoses safely and effectively is crucial for maintenance and repairs. This blog provides a step-by-step guide to help you navigate the process, minimizing risks and preventing damage. Understanding the proper techniques ensures you avoid fluid spills, system contamination, and potential injuries.
We’ll cover essential safety precautions, necessary tools, and the correct sequence for disconnecting hoses. Whether you’re a seasoned professional or a DIY enthusiast, this guide offers valuable insights into maintaining your hydraulic systems. Learn how to depressurize the system and manage residual pressure.
What Are Hydraulic Hoses
Recommended Hydraulic Hoses


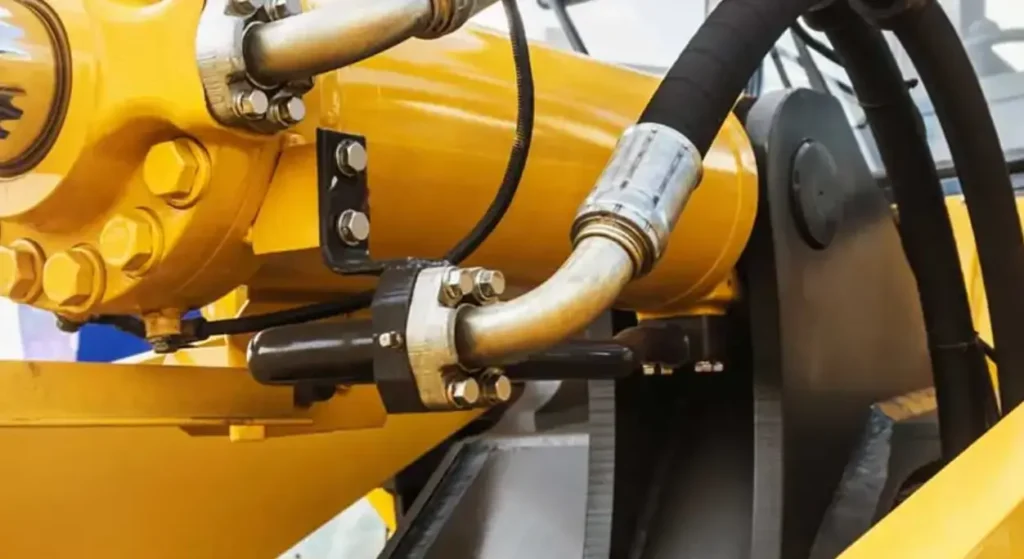
Hydraulic hoses are essential components in hydraulic systems, serving as flexible conduits for the transfer of hydraulic fluid between various parts of machinery and equipment. Here’s a breakdown of their key characteristics and functions:
Function:
- Their primary role is to transmit hydraulic fluid, which is typically oil, under high pressure. This fluid power enables the operation of hydraulic components like cylinders, motors, and valves.
Construction:
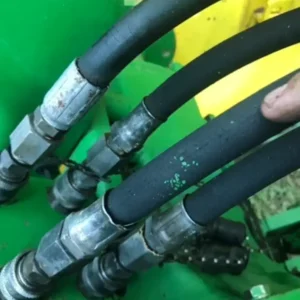
Hydraulic hoses are designed to withstand extreme pressures and conditions. They typically consist of:
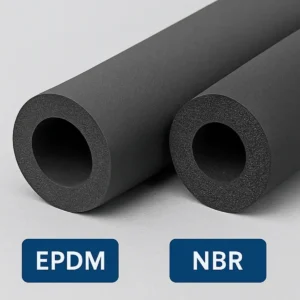
- Inner Tube: This layer carries the hydraulic fluid and is made of materials compatible with the fluid, such as synthetic rubber or thermoplastic.
- Reinforcement Layers: These layers provide the hose’s strength and pressure resistance. They are often made of braided or spiraled steel wire.
- Outer Cover: This layer protects the reinforcement from abrasion, weather, and other environmental factors.
In essence, hydraulic hoses are critical for the efficient and reliable operation of hydraulic systems, enabling the transfer of power in countless applications.
How to Disconnect Hydraulic Hoses
Disconnecting hydraulic hoses safely is vital for maintenance and repairs. This guide provides a step-by-step approach to properly disconnect hydraulic hoses, minimizing risks and preventing system contamination.
Step 1: Relieve System Pressure
Before attempting to disconnect any hydraulic hose, it’s crucial to relieve the system pressure. This prevents dangerous fluid discharge and potential injuries. Identify the pressure relief valve on your equipment. If your machine does not have a pressure relief valve, you must turn off the machine and allow the machine to sit for a while to allow the pressure to dissipate. Refer to the equipment’s manual for the specific location and procedure.
- Turn off the power: Ensure the hydraulic system is completely shut down and the equipment is powered off. This eliminates any potential for accidental activation.
- Locate the pressure relief valve: This valve is designed to release residual pressure in the hydraulic lines.
- Activate the relief valve: Follow the manufacturer‘s instructions to open the valve and release the pressure. You may hear a hissing sound as the pressure is released.
Once you have located the pressure relief valve, you must activate it. Depending on the machine, you will turn a lever, or push a button. Some machines will require you to turn the key to the on position, but not start the machine to activate the pressure relief system. Once the pressure is released, you can move onto the next step.
Step 2: Clean the Hose and Fittings
Contamination is a major concern in hydraulic systems. Before disconnecting the hose, thoroughly clean the area around the fittings to prevent dirt and debris from entering the system. Use a clean rag or shop towel to wipe down the hose and fittings, and consider using a specialized cleaning solution for stubborn grime.
- Wipe down the hose: Remove any visible dirt, grease, or debris from the hose surface.
- Clean the fittings: Pay close attention to the fitting connections, as these areas are prone to collecting contaminants.
- Use a cleaning solution: For heavily soiled areas, use a hydraulic system cleaner or a suitable solvent.
Cleaning the hoses and fittings is a crucial step in maintaining the longevity of your hydraulic system. Contamination can lead to premature wear and tear on components, causing leaks and system failures. By taking the time to clean the area, you are ensuring a clean disconnect, and a clean reconnect.
Step 3: Disconnect the Fittings
With the pressure relieved and the area clean, you can now disconnect the fittings. Select the appropriate wrenches for the fitting sizes to prevent damage. Loosen the fittings carefully, and be prepared for any residual fluid that may escape.
- Use the correct wrenches: Avoid using adjustable wrenches, as they can damage the fitting hex. Use appropriately sized box-end or flare nut wrenches.
- Loosen the fittings: Turn the wrenches counterclockwise to loosen the fittings.
- Be prepared for fluid: Even after relieving pressure, some fluid may remain in the hose. Have a container or rag ready to catch any spills.
When disconnecting the fittings, it is important to remember to not force the fittings. If a fitting is seized, use penetrating oil, and allow time for it to work. Forcing a fitting can cause damage to the fitting, or the hose itself. Once the fittings are loose, you can disconnect the hose from the machine.
Step 4: Cap or Plug the Hose and Ports
Once the hose is disconnected, immediately cap or plug the open ends to prevent contamination. Use appropriate caps or plugs designed for hydraulic fittings. This step is essential for maintaining the cleanliness and integrity of your hydraulic system.
- Cap the hose ends: Use caps or plugs that match the fitting sizes to seal the hose ends.
- Plug the ports: Cover the ports on the equipment with appropriate plugs to prevent contaminants from entering the system.
- Use clean caps and plugs: Ensure the caps and plugs are clean and free from debris before use.
Capping and plugging the hoses and ports is one of the most important steps. This step will keep your hydraulic system clean, and free from debris. This will also prevent any loss of hydraulic fluid. Debris and lost hydraulic fluid will cause damage to your machine.
Step 5: Inspect the Hose and Fittings
After disconnection, take a moment to inspect the hose and fittings for any signs of damage or wear. Look for cracks, abrasions, or corrosion. Damaged components should be replaced to prevent future failures.
- Check for cracks and abrasions: Examine the hose surface for any signs of damage.
- Inspect the fittings: Look for damaged threads, corrosion, or deformation.
- Replace damaged components: If any damage is found, replace the hose or fittings before reconnecting.
By inspecting the hoses and fittings after disconnection, you are ensuring the longevity of your hydraulic system. Damaged components will cause leaks, and failures. By replacing damaged components, you are preventing future failures.
How to Disconnect Hydraulic Hose From John Deere Tractor
Step 1: Lower and Secure the Implement
Begin by lowering any attached implement to the ground or a secure support. This reduces pressure in the hydraulic lines and prevents accidental movement during disconnection. Engage the parking brake and turn off the engine to ensure the tractor is stable.
Step 2: Relieve Hydraulic Pressure
Locate the hydraulic pressure relief lever or valve, typically near the hydraulic control levers. Activate it to release any residual pressure in the hydraulic system. This step is crucial for safe disconnection and preventing fluid spray.
Step 3: Clean the Hose and Fittings
Thoroughly clean the area around the hydraulic hose fittings with a clean rag. Remove any dirt, debris, or grease that could contaminate the hydraulic system. This ensures a clean disconnection and reconnection.
Step 4: Disconnect the Fittings
Using the appropriate wrenches, carefully loosen and disconnect the hydraulic hose fittings. Be prepared for a small amount of residual fluid to escape. Avoid twisting or pulling on the hose excessively.
Step 5: Cap or Plug the Hose and Ports
Immediately cap or plug the disconnected hydraulic hose ends and the ports on the tractor. This prevents contamination and fluid loss. Use clean, compatible caps or plugs designed for hydraulic fittings.
How to Disconnect Hydraulic Hose From Kubota Tractor
Step 1: Park and Secure the Tractor
Park the Kubota tractor on a level surface, engage the parking brake, and lower any attached implements to the ground. Turn off the engine and remove the key to prevent accidental start-up during the disconnection process.
Step 2: Release Hydraulic System Pressure
Locate the hydraulic pressure relief valve or lever, often near the hydraulic control levers or under the seat. Activate it according to the operator’s manual to release any trapped pressure within the hydraulic lines.
Step 3: Clean the Hose Connections
Use a clean cloth or rag to thoroughly wipe down the hydraulic hose fittings and the surrounding area. Remove any dirt, grease, or debris to prevent contamination of the hydraulic system during disconnection.
Step 4: Disconnect the Hose Fittings
Using the appropriate wrenches, carefully loosen and disconnect the hydraulic hose fittings. Be prepared for a small amount of hydraulic fluid to drip. Avoid twisting or pulling on the hose with excessive force.
Step 5: Cap or Plug Open Connections
Immediately place clean, compatible caps or plugs on the disconnected hydraulic hose ends and the corresponding ports on the tractor. This step prevents contamination and fluid loss, ensuring the integrity of the hydraulic system.
How to Disconnect Hydraulic Hose From New Holland Tractor
Step 1: Park and Secure the Tractor
Park the New Holland tractor on a level surface, engage the parking brake, and lower any mounted implements to the ground. Turn off the engine and remove the ignition key to prevent any accidental activation during the disconnection process.
Step 2: Relieve Hydraulic System Pressure
Locate the hydraulic system pressure relief valve or lever, which is typically found near the hydraulic control levers or within the operator’s station. Activate the relief mechanism according to the manufacturer‘s instructions to release trapped pressure.
Step 3: Clean the Hose and Fittings
Thoroughly clean the hydraulic hose fittings and the surrounding area with a clean cloth or rag. Remove any dirt, grease, or debris to prevent contamination of the hydraulic fluid and system during the disconnection process.
Step 4: Disconnect the Hydraulic Fittings
Using the appropriate wrenches, carefully loosen and disconnect the hydraulic hose fittings. Be prepared for a small amount of hydraulic fluid to drip. Avoid twisting or pulling excessively on the hose to prevent damage.
Step 5: Cap or Plug Open Connections
Immediately place clean, compatible caps or plugs on the disconnected hydraulic hose ends and the corresponding ports on the tractor. This step is essential to prevent contamination and fluid loss, ensuring the longevity and proper function of the hydraulic system.
Why Hydraulic Hose Won’t Disconnect
Hydraulic hoses refusing to disconnect often stem from a combination of pressure buildup, physical binding, and fitting issues. Residual pressure, even after attempting to relieve the system, can create a hydraulic lock, making it nearly impossible to separate fittings. This can occur due to:
- Incomplete Pressure Relief: The relief valve might not have fully released all pressure.
- Thermal Expansion: Heat can cause fluid to expand, increasing pressure in trapped lines.
- Check Valves: Some systems have check valves that prevent backflow, trapping pressure.
Physical binding is another common reason for stubborn hose connections. Dirt, rust, or damage can seize threads or sealing surfaces, preventing them from turning. This binding can be exacerbated by:
- Corrosion: Rust and oxidation can fuse fittings together.
- Debris: Dirt, grit, and other contaminants can lodge in threads.
- Damage: Dents or deformities in fittings can prevent proper movement.
Finally, issues with the fittings themselves can cause disconnection problems. Cross-threading, overtightening, or damaged sealing surfaces can create a situation where the fittings are difficult or impossible to separate. This includes:
- Cross-Threaded Fittings: Threads become damaged and bind together.
- Overtightened Fittings: Excessive torque can deform threads or sealing surfaces.
- Damaged Seals: Worn or damaged O-rings or other seals can create a vacuum or bind.
Conclusion
Disconnecting hydraulic hoses safely and effectively requires careful attention to pressure release, proper tool usage, and contamination prevention. By following the outlined steps, you can minimize risks and ensure a smooth disconnection process. Remember, hydraulic systems operate under high pressure, making safety paramount. Always double-check pressure release and use appropriate PPE.
Regular maintenance and proper disconnection techniques extend the lifespan of your hoses and prevent system damage. Understanding the different fitting types and their specific disconnection requirements is crucial for efficient operation. Consistent adherence to these practices ensures a safe and productive work environment.
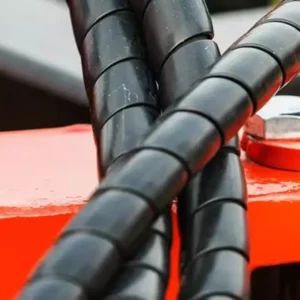
For reliable, high-quality wholesale hydraulic hoses, including spiral and braided options, contact Gushan Rubber today. We offer a wide range of hoses to meet your specific needs. Get in touch for competitive pricing and expert support.