Connecting a pressure washer hose may seem simple, but doing it correctly is crucial for achieving maximum cleaning power. Whether you’re a first-time user or a seasoned professional, ensuring a secure and leak-free connection will improve your pressure washer’s efficiency. In this blog, we’ll walk you through the proper steps to connect your hose.
The right connection ensures that water flows effectively from the machine to the nozzle, without any loss of pressure or potential leaks. We’ll provide you with easy-to-follow instructions, tips for preventing common issues, and advice on choosing the best hoses for your specific pressure washer model.
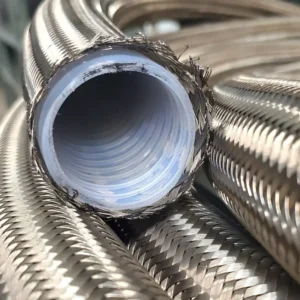
Pressure Washer Hose Components
Understanding the key components of a pressure washer hose can help ensure you select the right one for your needs. Each part plays a critical role in the performance and durability of the hose, from preventing leaks to ensuring proper water flow.
Below are the essential components of a pressure washer hose.
- Hose Cover: The hose cover protects the internal layers from external damage, including abrasion, UV rays, and chemical exposure. Made of durable materials, it extends the hose’s lifespan by preventing wear and tear.
The cover ensures that the hose can withstand harsh environmental conditions, providing durability in various work settings. - Inner Tube: The inner tube carries the water from the pressure washer to the nozzle. Typically made of rubber or thermoplastic, this component must resist high pressure and temperatures to function efficiently.
The inner tube ensures that water flows smoothly without bursts or leaks, maintaining consistent pressure throughout the cleaning process. - Reinforcement Layer: The reinforcement layer provides strength and flexibility, preventing the hose from kinking or collapsing under pressure. Made from braided steel or polyester, it helps the hose withstand the intense force generated by the pressure washer.
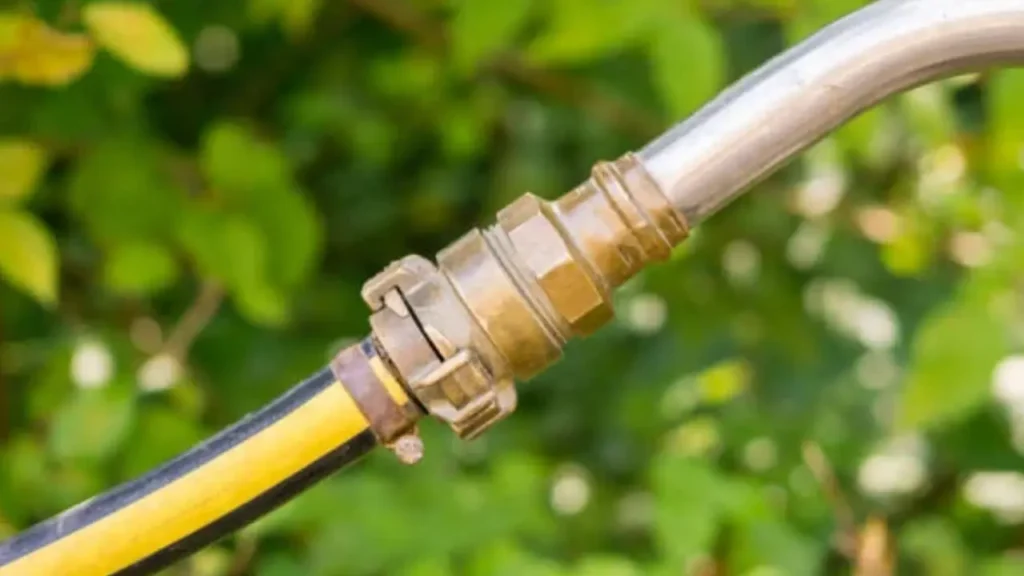
This layer maintains structural integrity, allowing the hose to resist damage and maintain consistent performance under high pressure. - Fittings and Couplings: Fittings and couplings are used to connect the hose to the pressure washer machine and nozzle. Typically made from brass or stainless steel, these components ensure a secure, leak-free connection.
They are designed for durability and ease of use, allowing for quick and efficient attachment and detachment during cleaning tasks.
How to Connect a Pressure Washer Hose?
Connecting a pressure washer hose correctly ensures optimal cleaning performance. Whether you’re using a residential or commercial pressure washer, understanding how to connect the hose securely will help you avoid leaks, loss of pressure, and unnecessary wear. Follow these five simple steps for a hassle-free setup.
Tools Needed:
- Pressure washer machine
- Pressure washer hose
- Nozzle attachment
- Water source (hose bib)
- Adjustable wrench (optional)
Step 1: Turn Off the Pressure Washer
Before connecting the hose, always turn off your pressure washer and ensure it’s not in use. This prevents any accidental water spray or pressure buildup during setup. Disconnect any previous hoses or attachments to ensure a clean, safe start for your connection process.
Turning off the machine also allows you to check for any damage to the hose or fittings before beginning the connection. It ensures you’re working with a safe and ready-to-use pressure washer setup. Always confirm that the power is off before proceeding to avoid electrical hazards.
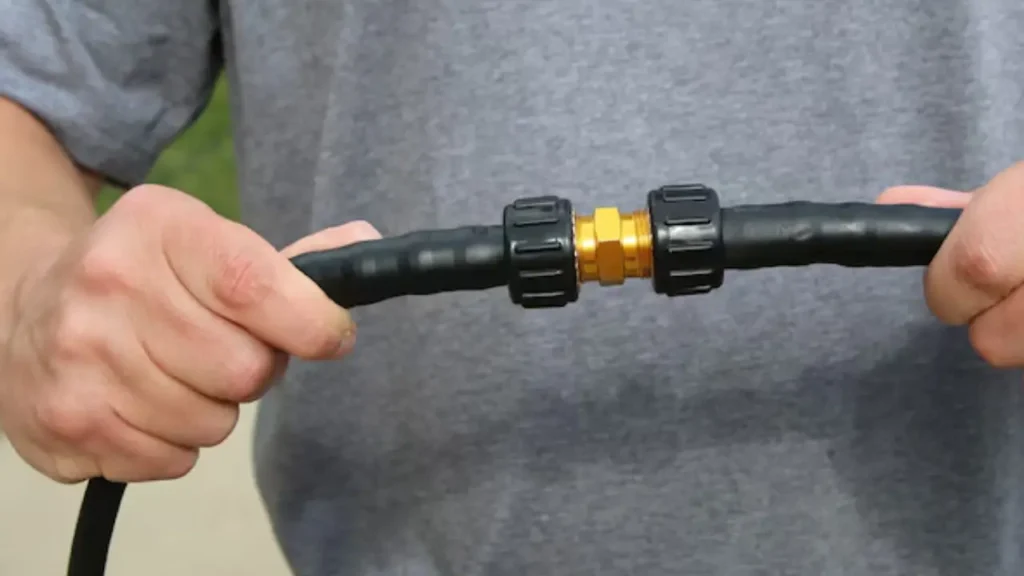
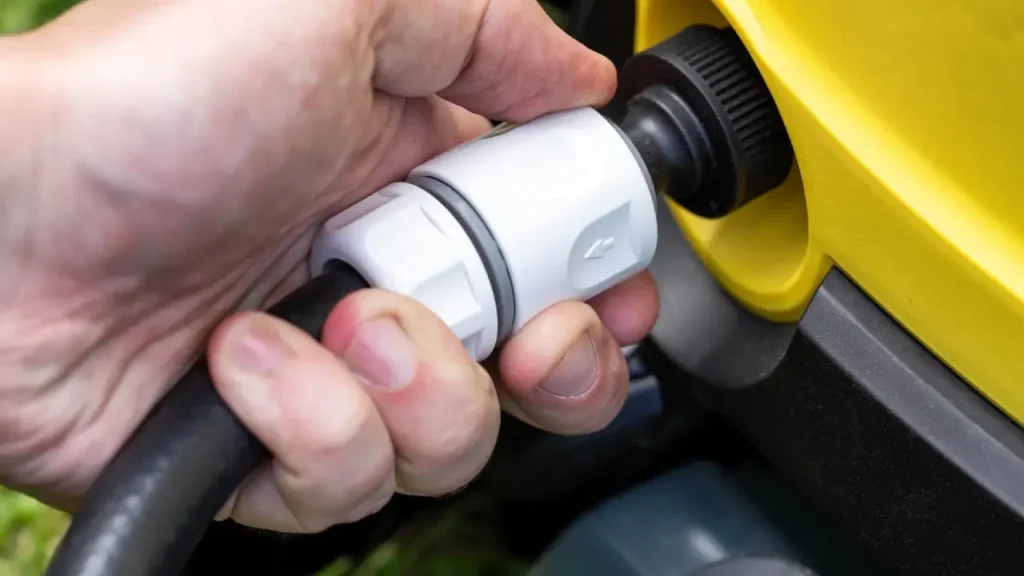
Step 2: Attach the Hose to the Pressure Washer Inlet
Connect one end of the pressure washer hose to the water inlet on your pressure washer. Make sure the hose is securely attached by screwing it tightly to avoid leaks. Ensure the connection is straight and properly aligned to prevent any strain on the fittings.
Double-check the tightness of the connection. If the hose is loose, it may lead to water leakage and reduced pressure during use. Use an adjustable wrench if needed to tighten the fitting, but avoid overtightening, which could cause damage to the hose or the washer’s inlet.
Step 3: Connect the Other End of the Hose to the Nozzle
Now, take the other end of the hose and connect it to the pressure washer nozzle or spray gun. Again, make sure the connection is secure by tightening the fittings. A loose nozzle connection can cause water to leak out, reducing cleaning efficiency and posing a potential safety risk.
As with the machine side, ensure the nozzle is properly aligned with the hose fitting. Check for any wear or damage on the nozzle before attaching it to ensure that it functions properly. A tight, secure nozzle ensures a steady and consistent water flow when you begin the pressure washer.
Step 4: Connect the Water Source
Attach the free end of the hose to a reliable water source. Ensure the faucet or hose bib is tightly secured and free of leaks. Turn on the water supply to the pressure washer and check that the hose has enough water pressure to operate effectively.
Before turning on the pressure washer, let the water run through the hose for a few seconds to eliminate any air pockets. This helps ensure that the hose is fully primed and ready for high-pressure use. A steady water supply is essential for maintaining optimal performance during cleaning.
Step 5: Test the Connection
Once all connections are secure, test the pressure washer hose by turning on the machine. Check for any leaks or issues, such as low pressure, which could indicate a loose or improperly connected hose. Running the washer briefly will ensure everything is functioning correctly.
If the hose or nozzle shows signs of leaks or pressure loss, turn off the washer immediately and recheck all connections. Tighten any loose parts, and if the issue persists, inspect the hose or nozzle for damage. Regular checks will help keep your pressure washer in optimal condition.
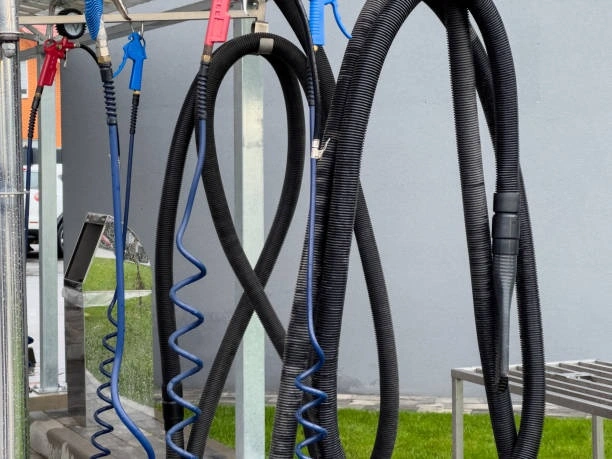
How to Connect Garden Hose to Pressure Washer?
Connecting a garden hose to a pressure washer is a simple process, but it’s essential to ensure everything is securely in place for optimal performance. In this guide, we’ll walk you through the necessary steps to properly connect your garden hose to your pressure washer for effective cleaning.
Tools Needed:
- Pressure washer
- Garden hose
- Hose connector (if needed)
- Water source (hose bib)
- Adjustable wrench (optional)
Step 1: Turn Off the Pressure Washer
Before connecting the garden hose, always turn off the pressure washer. This is to ensure that there is no pressure in the machine and to avoid any accidents while you make the connections. Disconnect any previous hoses to start with a clean slate.
Turning off the machine also allows you to inspect the hose and connectors for any signs of wear or damage. If everything looks good, you can safely proceed with the connection process, ensuring all parts are ready for use and free of any leaks or cracks.
Step 2: Attach the Garden Hose to the Pressure Washer Inlet
Next, take the garden hose and connect one end to the water inlet on your pressure washer. Make sure the connection is tight, as loose fittings can lead to leaks or pressure loss. Align the hose properly before securing it to prevent strain on the fittings.
If necessary, use a hose connector to create a secure attachment between the garden hose and the pressure washer. Tighten the connector with your hands or an adjustable wrench if needed. Just be sure not to overtighten, as this could damage the connector or hose threads over time.
Step 3: Connect the Other End of the Garden Hose to the Water Source
Now, connect the other end of the garden hose to a reliable water source, such as a hose bib. Ensure that the faucet is securely closed before making the connection to avoid sudden water flow when attaching the hose. Tighten the hose fitting to prevent leaks.
After attaching the hose to the water source, open the faucet fully to allow water to flow through the hose. Check for any leaks in the connection and ensure the water pressure is strong enough to operate the pressure washer efficiently before turning the machine on.
Step 4: Check for Leaks and Test the Connection
Before starting your cleaning task, turn on the pressure washer briefly to check for any leaks or issues with water flow. If you notice water leaking from the hose or connectors, turn off the pressure washer and recheck the connections. Tighten any loose fittings to prevent further leakage.
Testing the hose connection ensures the water is flowing correctly, and the pressure washer is operating at full capacity. This simple check helps prevent any performance issues during your cleaning process. Make sure the water is flowing smoothly and there are no signs of pressure loss before proceeding.
Step 5: Turn On the Pressure Washer and Begin Cleaning
Once the garden hose is securely connected and you’ve tested the water flow, it’s time to turn on the pressure washer. Make sure all safety precautions are in place before starting the machine. Slowly increase the pressure to your desired setting.
Begin your cleaning tasks by directing the spray to the surface you wish to clean. Always monitor the hose connections during use to ensure they remain secure. Regularly check for any leaks or performance issues, which can indicate that the hose needs adjustment or maintenance.
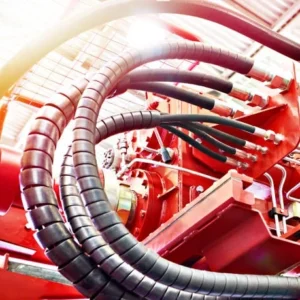
Common Pressure Washer Hose Connection Issues
While connecting a pressure washer hose is typically straightforward, several issues can arise that affect performance. Recognizing these common connection problems early can help prevent damage to the machine and ensure efficient cleaning.
Below are some of the most frequent connection issues and how to address them.
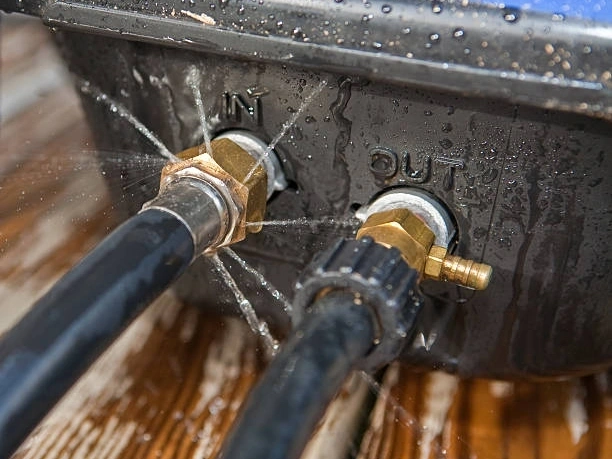
- Leaks at the connection points: Leaks are one of the most common issues when connecting a pressure washer hose. These can occur at both the inlet and nozzle fittings, leading to water loss and reduced pressure.
Leaks may be caused by improper tightening, worn-out washers, or damaged hose ends. Ensure that all connections are securely tightened and check the washers for any visible damage before starting the machine. - Loose or misaligned fittings: If the hose fittings are not properly aligned or securely tightened, it can cause water to spill or flow inconsistently. This affects cleaning efficiency and may also cause pressure fluctuations.
Always ensure that the fittings are aligned correctly and tightened to the manufacturer’s specifications. Using an adjustable wrench can help achieve a secure and tight connection without over-tightening, which could damage the fittings or hose. - Water pressure loss: Low water pressure can result from poor connections, such as a loose hose attachment or damaged seals. This can significantly affect the effectiveness of the pressure washer, requiring longer cleaning times.
Check for any loose connections, and ensure that the hose is properly connected to both the pressure washer and the water source. Also, inspect for damage or wear along the hose or fittings that could be affecting water flow. - Kinks or bends in the hose: Kinks or sharp bends in the hose can restrict water flow, leading to a drop in pressure or causing the hose to rupture. This is especially common if the hose is not stored correctly.
Avoid placing the hose in positions where it can bend or twist during use. If you notice any kinks, straighten them out before use, and consider using a hose reel to keep the hose organized and free of tangles. - Improper hose material for the job: Using the wrong hose material for your cleaning task can result in weak performance or even hose damage. For example, a hose not rated for high pressure can rupture under strain.
Make sure to select a hose that matches the pressure rating of your pressure washer. The material should be durable enough to handle the conditions of your specific cleaning job, ensuring long-lasting performance.
Importance of Proper Pressure Washer Hose Connections
Properly connecting your pressure washer hose is crucial to ensure the machine operates efficiently and safely. A secure connection prevents leaks, reduces pressure loss, and improves the overall performance of the pressure washer. Ensuring that connections are correctly made also prolongs the life of your equipment and enhances the quality of your cleaning tasks.
- Prevents water leaks: Properly connecting the hose ensures there are no leaks at the connection points. Leaks can waste water, reduce pressure, and make the cleaning process inefficient.
Ensuring the hose is tightly and securely connected prevents water from escaping, allowing the pressure washer to operate at full capacity. This helps conserve water and ensures that your cleaning tasks are done quickly and effectively. - Maintains optimal pressure: A secure hose connection helps maintain consistent water pressure, which is essential for achieving the desired cleaning results. Loose or poorly connected hoses can lead to pressure drops.
Properly connecting your hose prevents pressure loss, ensuring the water flows with maximum force to tackle tough cleaning jobs. This is especially important for tasks like driveway cleaning and surface preparation, where high pressure is needed. - Reduces wear and tear on equipment: Improper connections can lead to strain on your pressure washer, resulting in premature wear or damage to fittings and hoses. A tight connection helps reduce the risk of damaging the machine.
By ensuring that connections are properly sealed and secure, you avoid unnecessary wear on both the hose and pressure washer, saving money on repairs and replacements in the long run. - Improves safety during use: Incorrectly connected hoses can lead to safety hazards, such as water spray or pressure buildup. Properly connecting the hose ensures the water is directed safely to the nozzle.
Secure connections help eliminate risks associated with water leaks or unexpected pressure surges. This ensures a safer working environment, preventing injury or accidents during the cleaning process, especially in industrial or high-pressure situations. - Ensures efficiency and performance: A well-connected hose allows your pressure washer to work efficiently, delivering consistent results every time. Proper connections maximize water flow and ensure that the washer is using its full power.
Efficient operation reduces the time spent on cleaning tasks, improves performance, and enhances overall satisfaction with your pressure washer. With proper hose connections, you can achieve optimal results with every cleaning job.
Conclusion
In conclusion, connecting a pressure washer hose properly is essential for maximizing cleaning efficiency. By following the steps outlined, you’ll ensure a tight and secure connection, minimizing leaks and maintaining high pressure. Always check the connections before starting any cleaning task, as this will help prevent any operational issues.
Choosing the right hose for your pressure washer is just as important as the connection itself. Be sure to use a hose that matches your machine’s specifications to avoid unnecessary pressure loss. This small detail will make a big difference in your cleaning performance and overall machine longevity.
If you’re looking to purchase pressure washer hoses at wholesale prices, Gushan Rubber offers durable, reliable options that are perfect for any cleaning job. Our hoses are designed to deliver optimal performance, ensuring your pressure washer works at its best every time.