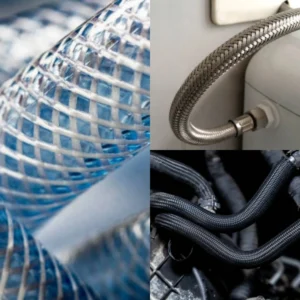
A leaking rubber hose can quickly turn a simple task into a messy emergency, whether it’s on a garden sprinkler, a car engine, or industrial equipment. Understanding how to properly seal a rubber hose is a crucial maintenance skill that can save you time, money, and potential water damage. We will guide you through the most effective and durable repair methods available.
This comprehensive guide breaks down the process of sealing a rubber hose into simple, actionable steps. From quick, temporary fixes for small punctures to durable, permanent solutions for large tears requiring a mender, you will learn the necessary techniques and materials. Get ready to stop those annoying leaks and restore your hose’s full functionality today.
When to Seal Rubber Hoses?
Identifying the right moment to seal or repair a rubber hose is key to preventing further damage, conserving fluids, and maintaining the efficiency of your system. Proactive sealing can often save a hose that would otherwise need complete replacement, making timely intervention critical.
Here are the key indicators and situations that necessitate sealing a rubber hose:
- Visible Cracks or Fissures: If you notice small, spiderweb-like cracks, especially near hose ends or bends, it signals rubber degradation and impending failure. Sealing these areas prevents major blowouts under pressure and stops minor weep leaks immediately.
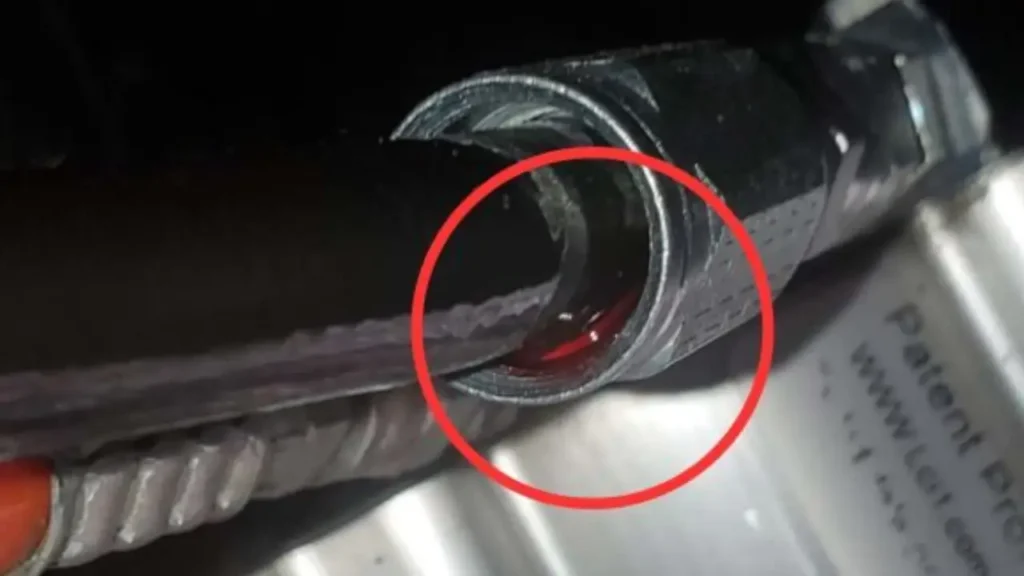
- Fluid Leaks or Seepage: Any sign of liquid—whether it’s water, coolant, or oil—dripping, misting, or seeping from the hose body or a connection point requires immediate attention. A leak, no matter how minor it seems, will rapidly worsen, leading to system pressure loss and environmental mess.
- Soft or Spongy Sections: A rubber hose that feels unusually soft, spongy, or swollen in a particular area may have internal damage or be chemically compromised. Sealing this weakness, often by cutting out the bad part and splicing, is necessary before it ruptures under normal operating conditions.
- Puncture Damage from Impact: Sharp objects or debris can cause pinhole punctures or small tears, which often happen in garden or industrial environments. Sealing this hole with a strong, flexible patch immediately after damage ensures the hose remains functional and prevents the entry of contaminants into the fluid path.
Rubber Hose Sealant

Choosing the correct rubber hose sealant is paramount to a durable and effective repair, as the sealant must withstand the operating conditions, including pressure, temperature, and chemical exposure. The right product ensures flexibility and adhesion without degrading the hose material itself.
Here are the primary types of rubber hose sealants used for repairs:
- Liquid Rubber Cement/Adhesive: This is typically found in bicycle tire or general rubber repair kits and is used in conjunction with a rubber patch. The cement creates a flexible, chemically-bonded seal, requiring the repair area to be completely clean and dry before application for optimal stickiness.
- RTV (Room Temperature Vulcanizing) Silicone: Often used as a gasket maker or a supplementary sealant around metal fittings, RTV silicone provides excellent flexibility and high-temperature resistance. It’s applied as a bead or thin film and cures into a durable, flexible rubber seal that resists vibration and heat.
- Epoxy Putty (Two-Part): A strong, moldable filler for rigid, non-flexible repairs, like sealing a pinhole leak in a hose intended for low-pressure use. The putty is kneaded to activate and hardens into a very durable, non-flexible patch, although it is not recommended for high-flex or high-pressure hoses.
- Self-Fusing Silicone Tape: Technically a wrapping method, this specialized, non-adhesive tape is activated by stretching and wrapping tightly over the leak. It quickly fuses into a solid, waterproof, and air-tight rubber layer, offering a fast, high-pressure, temporary, or semi-permanent repair solution.
How to Seal a Rubber Hose?
A successful rubber hose repair depends heavily on having the correct tools and materials readily available before you begin. Gathering everything beforehand ensures a smooth, uninterrupted repair process, whether you are patching a small hole or splicing a larger tear.
Tools Needed
- Utility Knife or Shears: Used for making clean, straight cuts to completely remove a severely damaged section. A sharp blade is essential for a precise fit.
- Rubber Patch Kit/Cement: Essential for minor punctures and small leaks, these kits provide a durable, flexible seal. Ensure the adhesive is compatible with your hose’s material.
- Fine-Grit Sandpaper: Used to lightly scuff the surface around a leak, preparing the area for adhesive. This increases the bond strength of any patch applied.
- Hose Mender/Splice Fitting: Required for joining two cut ends of a hose back together after removing a damaged section. It must match the hose’s inner diameter.
- Hose Clamps: Metal clamps are vital for securing a hose splice onto a mender fitting. They ensure a tight, high-pressure seal that will not detach during use.
- Cleaning Rags and Degreaser: Needed to thoroughly clean and dry the repair area. A clean surface is crucial for the proper adhesion of any sealing material.
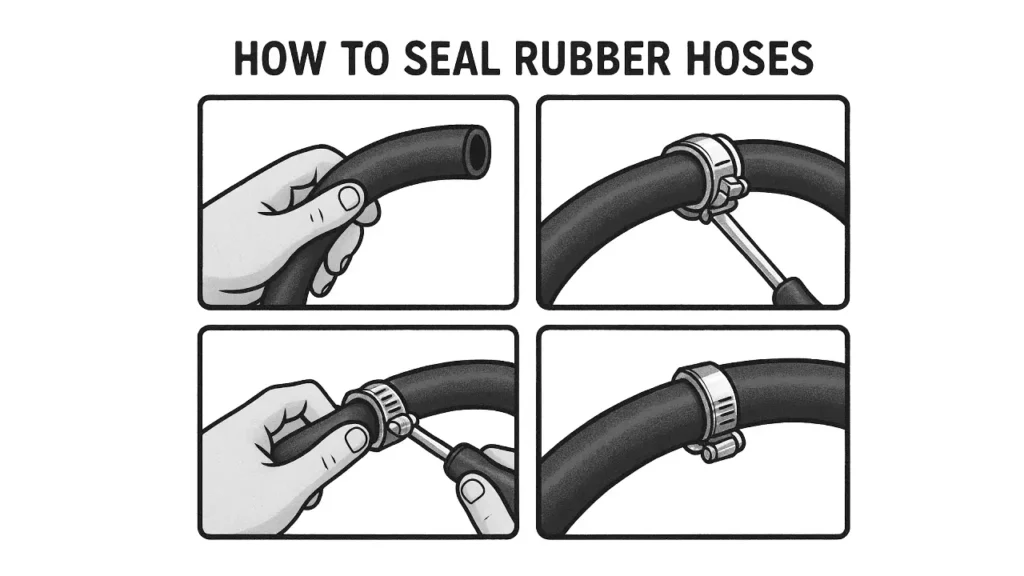
Step 1: Drain and Clean the Hose
Before any repair, ensure the hose is completely drained of all liquids and disconnected from any pressure source. This step is critical for safety and allows the repair materials to adhere properly to the rubber.
Thoroughly clean the outside surface of the hose around the damaged area using a degreaser or mild soap and water. The area must be dry, clean, and free of any dirt, oil, or debris for a reliable seal to be achieved.
Step 2: Prepare the Repair Surface
For patching, use fine-grit sandpaper to lightly scuff the area directly surrounding the leak or puncture. This roughening creates a better texture, which significantly improves the bond between the patch material and the original rubber.
For splicing, use a sharp utility knife to make two clean, straight cuts, completely removing the damaged section. Ensure the remaining hose ends are smooth and perpendicular to the hose’s length for a tight fit with the mender.
Step 3: Apply the Rubber Patch (Small Leaks)
If using a patch kit, apply a thin, even layer of rubber cement or specialized adhesive over the cleaned and roughened area. Allow the cement to set until it becomes tacky, strictly following the product’s recommended drying time.
Press the patch firmly over the leak, starting from the center and working outward to squeeze out any trapped air bubbles. Maintain firm pressure on the patch for several minutes, then let it cure completely for the time specified by the manufacturer.
Step 4: Insert the Hose Mender (Large Damage)
For cut hoses, select a barbed hose mender or splice fitting that perfectly matches the inner diameter of your rubber hose. This fitting will bridge the gap left by the removed damaged section.
Firmly push one end of the hose onto one side of the mender, ensuring it fully covers all the barbs or ribbed sections. Repeat this process with the other hose end onto the opposite side of the splice fitting to create a continuous path.
Step 5: Secure the Splice with Clamps
Use hose clamps (metal screw-down types are best) over the spliced area to prevent the hose ends from slipping off the mender under pressure. Place one clamp on each side, positioned directly behind the mender’s barbs.
Tighten the clamps using a screwdriver until they tightly compress the rubber around the fitting. Be careful not to overtighten, which could cut into or damage the hose material, compromising the integrity of the seal.
Step 6: Test the Repaired Seal
Once the patch is cured or the clamps are fully secured, slowly and cautiously reintroduce fluid and pressure into the hose system. Closely inspect the repaired area for any signs of weeping, dripping, or leakage.
If the repair holds without any leaks after a few minutes under full operating pressure, the hose is successfully sealed and ready to be put back into regular service. If a leak occurs, you must repeat the necessary steps.
Why Seal Rubber Hoses?

Understanding the necessity of sealing rubber hoses is fundamental to efficient system operation and safety across various applications, from simple garden work to complex industrial machinery. A small leak, if left unaddressed, can rapidly escalate into a major failure, leading to significant costs and downtime.
Here are the primary reasons why sealing rubber hoses is a critical maintenance task:
- Prevent Fluid Loss and Waste: Sealing leaks immediately conserves valuable or critical fluids, such as coolant in a car or specialized hydraulic oils in machinery. This ensures the system maintains its proper fluid levels and pressure, avoiding waste and the need for frequent, costly refills.
- Maintain System Pressure: Many applications rely on a consistent, high fluid pressure to function correctly, like power steering or pressurized washing systems. An unsealed hole causes pressure drops, which directly impacts the system’s performance, leading to inefficient operation or complete functional failure.
- Avoid Equipment Damage: Leaking hoses, especially those carrying corrosive chemicals or hot fluids, can damage surrounding components, wiring, and materials. Sealing prevents this collateral damage, protecting expensive machinery and reducing long-term repair costs associated with corrosion or thermal stress.
- Ensure Safety and Environment Protection: Hoses carrying dangerous liquids, such as fuel, acid, or high-temperature water, pose a significant safety risk when they leak. Sealing them immediately protects personnel from burns or chemical exposure and safeguards the environment from contamination or spillage.
- Extend Hose Lifespan: Proactively sealing small punctures or cracks prevents them from expanding into catastrophic tears under pressure or flexing. Repairing a minor issue is far more cost-effective and extends the functional life of the hose, delaying the need for full replacement.
Rubber Hose Sealing Methods

To choose the correct and most effective method for sealing a rubber hose, you must first accurately determine the size, location, and severity of the leak. Methods range from quick, adhesive patches for minor punctures to surgical cutting and splicing for major damage.
Here are the most common and reliable rubber hose sealing methods:
- Adhesive Rubber Patching: This method is ideal for sealing very small pinholes, cuts, or punctures in the main body of the hose. A flexible, rubber-compatible cement is used to bond a patch securely over the damaged area, restoring the hose’s integrity.
- Hose Mender/Splicing: Used for large tears, severely frayed ends, or damaged sections that cannot be reliably patched. This involves cutting out the bad part and inserting a barbed plastic or metal fitting (mender) to join the two good ends back together.
- Hose Clamps for Connections: Clamps are essential for securing a hose end onto a permanent fitting or a mender splice. Tightening a screw-driven clamp compresses the rubber securely around the fitting’s barbs, creating a strong, pressure-resistant, leak-free connection.
- Self-Fusing Silicone Tape: This specialized, non-adhesive tape is excellent for temporary or emergency repairs under pressure. It stretches and wraps tightly around the leak, fusing to itself within minutes to form a durable, waterproof, high-pressure seal that is easy to apply.
- Epoxy Putty Sealant: A two-part epoxy putty, often kneaded and applied by hand, can be used to fill and seal small cracks or holes on a clean, dry hose surface. This creates a hard, durable shell around the damage, though its flexibility is limited compared to rubber.
Conclusion
Successfully sealing a rubber hose extends its lifespan significantly and prevents inconvenient, damaging leaks that can waste time and resources. By following the detailed steps for assessing damage, applying a proper patch, or utilizing a strong hose mender and secure clamps, you ensure a long-lasting and reliable repair. A well-maintained and properly sealed hose is absolutely essential for maximum operational efficiency in any setting.
Remember that the best repair method depends entirely on the type of hose and the severity of the damage you are addressing. Always make sure to use high-quality materials and adhesives that are compatible with your hose’s specific application, especially in high-pressure or chemical-resistant environments. Regular inspection can catch small issues before they become major, costly problems.
For any projects that require superior-quality, durable rubber hoses that resist heavy wear and tear, rely on the excellent products available from Gushan Rubber. If your existing hoses are simply beyond a reliable repair, or if you need a dependable bulk supply for new installations, explore our extensive, performance-driven inventory. You can get wholesale rubber hoses directly from our Gushan Rubber team, guaranteeing industry-leading performance and exceptional value.