Cutting nylon braided hoses properly is essential for ensuring precise fits and leak-free connections in hydraulic, pneumatic, and fluid systems. Using the right tools and techniques prevents fraying, damage, and uneven cuts, helping maintain system performance and extending the life of hoses across industrial, automotive, and mobile applications.
Understanding the structure of nylon braided hoses and following safe cutting practices makes installation easier and more reliable. By mastering proper hose cutting, you can achieve clean edges, secure fittings, and optimal flow. This reduces maintenance issues, prevents leaks, and ensures efficient operation of hydraulic, pneumatic, and fluid transfer systems.
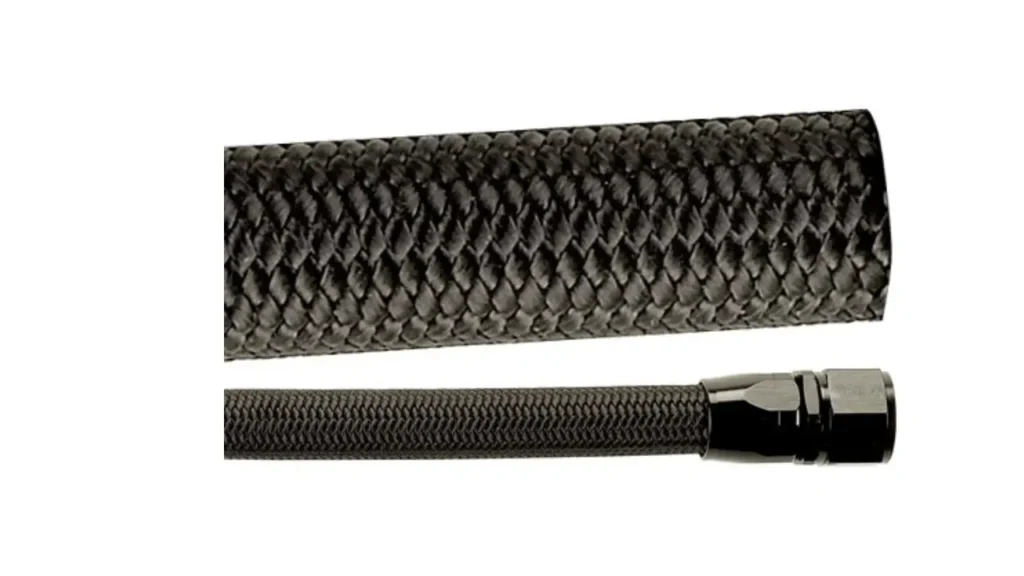
What is Nylon Braided Hose?

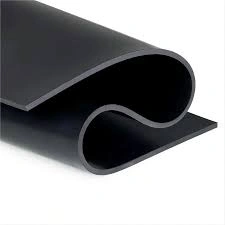
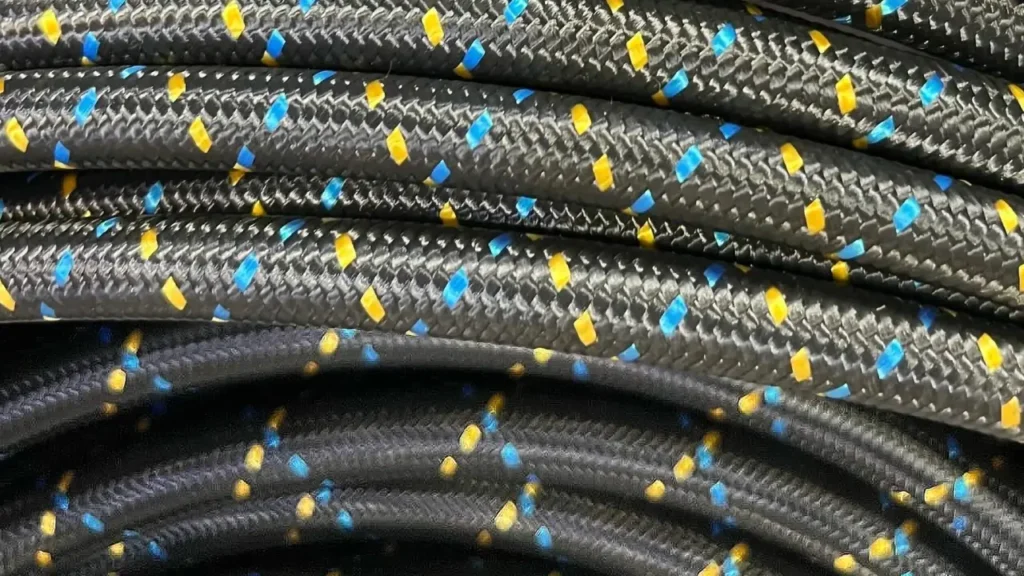
A nylon braided hose is a type of fluid transfer line designed for durability and high performance. It consists of an inner tube, typically made from a synthetic rubber or PTFE (Teflon), which handles the fluid.
Surrounding this inner tube is a layer of braided nylon, which provides the primary reinforcement. This outer layer protects the hose from abrasion, cuts, and punctures, while also helping to contain the pressure of the fluid.
The nylon braiding makes the hose flexible and lightweight, making it a popular choice in automotive, motorcycle, and industrial applications. It’s often used for fuel lines, oil lines, and brake lines where both strength and a clean, professional look are desired.
Why Need to Cut Nylon Braided Hose?
Cutting nylon braided hoses is necessary to ensure precise lengths for proper installation, secure fittings, and optimal fluid flow. Improperly sized hoses can cause leaks, kinks, or reduced system efficiency. Correct cutting maintains hose integrity, prevents fraying, and ensures long-lasting, reliable performance in hydraulic, pneumatic, and fluid systems.
- Achieve Accurate Hose Lengths – Cutting hoses to the correct length ensures they fit perfectly within the system layout. This prevents excess bending, reduces stress on fittings, and allows smooth fluid flow, enhancing system efficiency and prolonging hose life.
- Prevent Fraying and Damage – Using proper cutting techniques prevents the nylon braid from unraveling or fraying. Maintaining a clean cut protects hose integrity, reduces leaks, and ensures that fittings can be installed securely without compromising performance.
- Facilitate Easy Installation – Properly cut hoses simplify installation and connection to fittings or equipment. Correct lengths and clean edges allow for quick, safe assembly, reducing labor time, system downtime, and the risk of improper hydraulic or pneumatic operation.
- Maintain System Performance – Correctly sized and cut hoses maintain consistent fluid flow and pressure. Proper hose handling minimizes turbulence, prevents kinking, and ensures that hydraulic or pneumatic systems operate efficiently and reliably over time.
- Enhance Safety – Frayed or improperly cut hoses can lead to leaks, bursts, or equipment damage. Cutting hoses correctly protects operators, reduces maintenance hazards, and ensures safe, dependable operation in industrial, automotive, or mobile hydraulic systems.
What Do You Use to Cut Braided Hose?
- Hose Shears or Cutters: These are purpose-built tools that provide a clean, square cut without crushing the hose. They are our top recommendation for anyone planning to do this regularly. They work by using a sharp blade that closes tightly, similar to a pair of heavy-duty scissors, but with a design that keeps the hose from deforming.
- Fine-Tooth Hacksaw: A hacksaw with a fine-tooth blade can also work. We use this when a shear isn’t available. To prevent fraying, we wrap the area we’re cutting with electrical tape first. This holds the braiding in place and helps us get a cleaner cut.
- Rotary Tool with a Cut-Off Wheel: For the most precise cuts, especially on larger hoses or when we need a perfectly straight edge, a rotary tool is an excellent option. The high-speed rotation and abrasive wheel melt the nylon as it cuts, sealing the ends and preventing any fraying. This method requires care and safety precautions, as the tool can be dangerous if not used properly.
How to Cut Nylon Braided Hose?

Cutting nylon braided hoses correctly is essential for clean edges, secure fittings, and reliable fluid transfer. Improper cutting can cause fraying, leaks, or damage to the hose and system. Following proper steps and using the right tools ensures precise, safe cuts and maintains hose performance in hydraulic, pneumatic, and fluid systems.
Tools Needed
- Safety gloves and goggles
- Sharp utility knife or hose cutter
- Tape or hose clamps
- Ruler or measuring tape
- Marker or pen
Step 1: Measure and Mark the Hose
Measure the hose length carefully according to your system requirements. Use a ruler or measuring tape to ensure accuracy. Mark the cutting point clearly with a marker or pen to guide a precise cut. Proper measurement prevents excess hose length or tight bends that could reduce system efficiency.
Double-check the marked length against fittings and system layout. Ensuring the hose is correctly sized before cutting minimizes waste and prevents errors during the installation process. Accurate marking allows for clean, straight cuts, reducing the risk of fraying and maintaining smooth fluid flow in the system.
Step 2: Secure the Hose
Use tape, hose clamps, or a vice to secure the hose before cutting. Stabilizing the hose prevents movement, bending, or twisting during cutting, which ensures a clean, straight cut and protects the integrity of the nylon braid.
Properly securing the hose also protects the operator from accidental slips or uneven cuts. Stabilization helps maintain consistent hose diameter and reduces the risk of frayed ends, making subsequent installation and fitting attachment easier and safer.
Step 3: Cut the Hose
Using a sharp utility knife or hose cutter, carefully cut along the marked line. Apply even pressure and a steady motion to ensure a clean, straight cut without crushing the hose or damaging the braid. A precise cut maintains hose integrity for reliable operation.
Take your time while cutting to avoid fraying or uneven edges. A clean cut ensures the nylon braid remains intact, fitting securely into connectors or fittings. Proper cutting reduces installation problems, minimizes fluid leaks, and prolongs the service life of the hose.
Step 4: Inspect and Finish the Cut
After cutting, inspect the hose ends for fraying or irregularities. Trim any loose fibers or uneven edges to ensure smooth insertion into fittings. Proper finishing improves sealing and prevents leaks in hydraulic or pneumatic systems.
Check the hose against system requirements once more before installation. Ensuring the cut is clean and straight helps maintain fluid flow, reduces stress on fittings, and provides long-lasting, reliable performance in industrial, automotive, or mobile applications.
Step 5: Install the Hose
Insert the cut hose into the desired fitting or connector, ensuring proper seating and alignment. Tighten fittings according to manufacturer specifications, making sure the hose remains straight and undamaged for optimal performance. Proper installation reduces leaks and maintains safe fluid transfer.
After installation, test the system at low pressure to verify proper fluid flow and secure connections. Correct installation ensures the hose performs reliably under operating conditions, prevents leaks or bursts, and extends the service life of both the hose and the hydraulic, pneumatic, or fluid system.
How to Ensure a Leak-Free Connection After Nylon Braided Cutting?
Ensuring a leak-free connection after cutting nylon braided hoses is critical for system safety and performance. Improperly seated hoses or frayed ends can cause fluid leaks, pressure loss, or system failure. Following proper installation steps and inspection practices maintains reliable, long-lasting hydraulic, pneumatic, or fluid system operation.
- Inspect Hose Ends – Carefully examine the cut hose ends for fraying, uneven edges, or damage. Clean and trim any loose fibers to ensure the hose seats properly in fittings, preventing gaps that could cause leaks or reduce system efficiency.
- Use Proper Fittings – Select fittings compatible with the hose type and size. Ensure threads, ferrules, or connectors match specifications. Correct fittings create a secure mechanical and hydraulic seal, reducing the risk of fluid leaks during operation.
- Correct Insertion Depth – Insert the hose fully into the fitting according to manufacturer guidelines. Proper depth ensures that seals and ferrules engage correctly, maintaining a tight connection that withstands high-pressure operation and prevents fluid bypass.
- Tighten Fittings Properly – Use recommended torque values when securing fittings. Over-tightening can damage the hose or connector, while under-tightening may cause leaks. Consistent, precise tightening ensures reliable sealing and long-lasting performance.
- Pressure Test the Connection – After installation, gradually pressurize the system and check for leaks. Observing the hose and fitting under operational pressure verifies the connection is secure, allowing adjustments before full system operation.
How to Choose the Right Nylon Braided Hose?

Selecting the right nylon braided hose is essential for safe, efficient, and long-lasting operation in hydraulic, pneumatic, or fluid systems. The correct hose ensures proper pressure handling, chemical compatibility, and durability. Choosing poorly can lead to leaks, premature wear, or system failure, so careful consideration of specifications and application requirements is crucial.
- Determine Pressure Requirements – Assess your system’s operating and peak pressures to select a hose that can handle the load safely. Using a hose rated for appropriate pressure prevents bursting, reduces maintenance issues, and ensures reliable fluid transfer under all operating conditions.
- Consider Fluid Compatibility – Ensure the hose material is compatible with the hydraulic, pneumatic, or chemical fluids used. Proper compatibility prevents swelling, degradation, or leaks, maintaining consistent flow and protecting both the hose and connected system components from damage.
- Check Temperature Range – Choose a hose rated for the system’s operating temperature range. Temperature-resistant hoses prevent softening, cracking, or loss of flexibility under extreme heat or cold, ensuring safe and consistent performance in industrial, construction, or mobile applications.
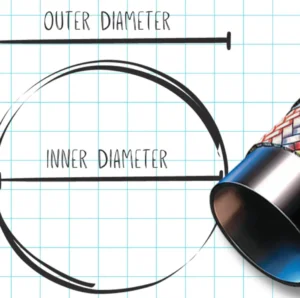
- Select Hose Size and Length – Measure and choose the appropriate inner diameter and length to match flow requirements and system routing. Correct sizing reduces back pressure, prevents kinks, and allows smooth installation, maintaining optimal system efficiency and hose longevity.
- Evaluate Environmental Conditions – Consider abrasion, UV exposure, moisture, or chemical contact in the hose’s environment. Selecting hoses with protective outer covers or coatings ensures durability, prevents premature wear, and maintains safe and reliable performance in harsh operating conditions.
Conclusion
Properly cutting nylon braided hoses ensures clean edges, prevents fraying, and maintains leak-free connections. By following correct techniques and using recommended tools, operators can achieve precise hose lengths, enhance system performance, and reduce installation and maintenance challenges across industrial, automotive, and mobile applications.
Mastering cutting techniques also protects the integrity of nylon braided hoses and their fittings. Cleanly cut hoses ensure consistent fluid flow, minimize stress on the hose structure, and reduce the risk of damage or failure. Proper hose handling improves safety, efficiency, and long-term system reliability.
For all your nylon braided hose needs, get wholesale nylon braided hoses from Gushan Rubber. We offer durable, flexible, and high-performance hoses suitable for hydraulic, pneumatic, and fluid transfer applications, providing reliable operation, long service life, and customizable options to meet diverse industrial and mobile system requirements.