Properly attaching hydraulic hoses is crucial for ensuring the safe and reliable operation of any hydraulic system. Improperly attached hoses can lead to leaks, blowouts, and even catastrophic system failures.
In this blog post, we’ll guide you through the essential steps and best practices for how to attach hydraulic hoses, from selecting the right fittings to proper hydraulic hose installation techniques.
How to Attach Hydraulic Hoses
1. Preparation
- Safety First: Wear appropriate safety gear, including safety glasses, gloves, and long sleeves.
- System Isolation: Isolate the hydraulic system to prevent unexpected fluid release. Turn off the power source and relieve any residual pressure.
- Component Inspection:
- Hose: Check the hose for any signs of damage, such as cuts, abrasions, or bulges. Ensure it’s the correct size and type for the application.
- Fittings: Inspect fittings for cracks, chips, or other defects.
- Cleanliness: Clean the hose ends and the fitting surfaces thoroughly with a suitable solvent (e.g., denatured alcohol). Remove any dirt, debris, or moisture.
2. Cutting the Hose
- Measure and Mark: Accurately measure the required hose length. Use a permanent marker to mark the cut point on the hose.
- Cutting Tool: Use a dedicated hose cutter to ensure a clean, perpendicular cut. Avoid using sharp tools like knives or blades, as they can damage the hose’s inner layers.
3. Fitting Preparation
- Lubrication: Apply a small amount of hydraulic fluid or a compatible lubricant to the threads of the fitting. This helps with assembly and reduces the risk of galling.
4. Hose Assembly
- Fitting Insertion: Carefully insert the fitting into the hose end. Ensure it’s inserted to the correct depth as specified by the manufacturer‘s instructions.
- Crimping (for crimped fittings):
- Use a hydraulic crimping tool specifically designed for the hose and fitting combination.
- Follow the manufacturer‘s instructions carefully to ensure proper crimping force and die selection.
- Crimp the fitting securely to the hose, creating a leak-proof and durable connection.
5. Final Checks
- Visual Inspection: Visually inspect the completed assembly for any signs of damage, leaks, or improper crimps.
- Leak Test (if applicable): If possible, conduct a low-pressure leak test to check for any leaks at the connection point.
6. Installation
- Routing: Route the hose carefully to avoid sharp bends, kinks, or contact with hot surfaces.
- Secure Mounting: Securely mount the hose using appropriate clamps or brackets to prevent movement and chafing.
Important Notes:
- Manufacturer‘s Instructions: Always refer to the manufacturer‘s instructions for the specific hose and fitting combination.
- Proper Tools: Use the correct tools and equipment for each step of the process.
- Safety: Prioritize safety throughout the entire process. Wear appropriate safety gear and follow all safety guidelines.
By following these steps and adhering to safety precautions, you can ensure proper and safe attachment of hydraulic hoses, minimizing the risk of leaks, failures, and system downtime.
How to Attach Hydraulic Hoses to Bobcat
Attaching hydraulic hoses to a Bobcat is a relatively straightforward process, but it’s important to follow the correct steps to ensure a secure and leak-free connection. Here’s a detailed guide on how to do it:
1. Preparing for Attachment
Shut Down and Release Pressure: Turn off the Bobcat engine and engage the parking brake. Then, locate the hydraulic pressure release valve and follow the manufacturer‘s instructions to release any residual pressure in the hydraulic system. This is crucial to prevent accidental fluid discharge and injuries.
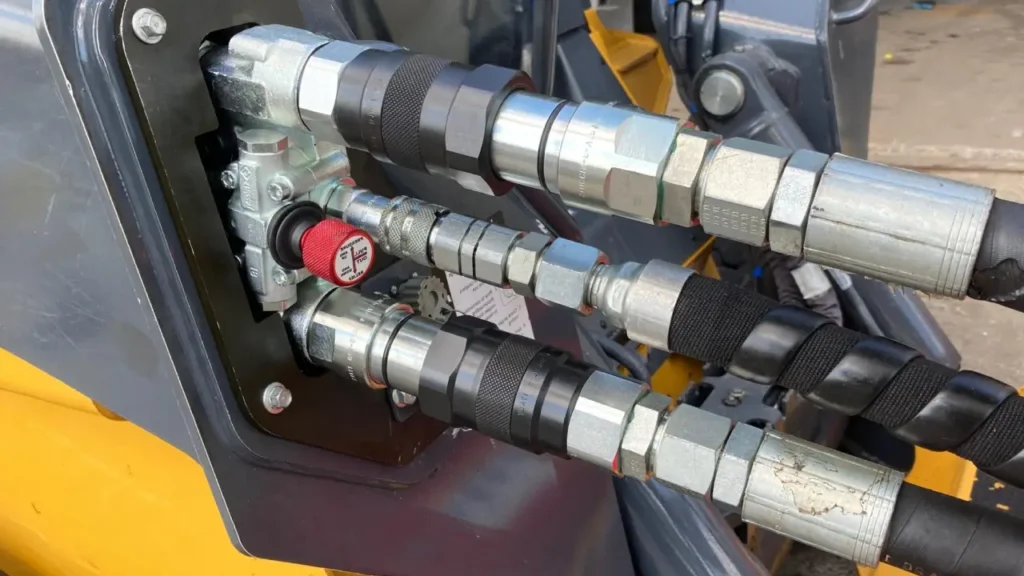
Identify the Correct Connections: Locate the attachment points on the Bobcat and the corresponding fittings on the hydraulic hoses. Ensure that the hose fittings match the attachment points on the Bobcat.
Clean the Connection Points: Use a clean, lint-free cloth to wipe down the attachment points on the Bobcat and the fittings on the hydraulic hoses. This will remove any dirt or debris that could interfere with the connection.
2. Attaching the Hoses
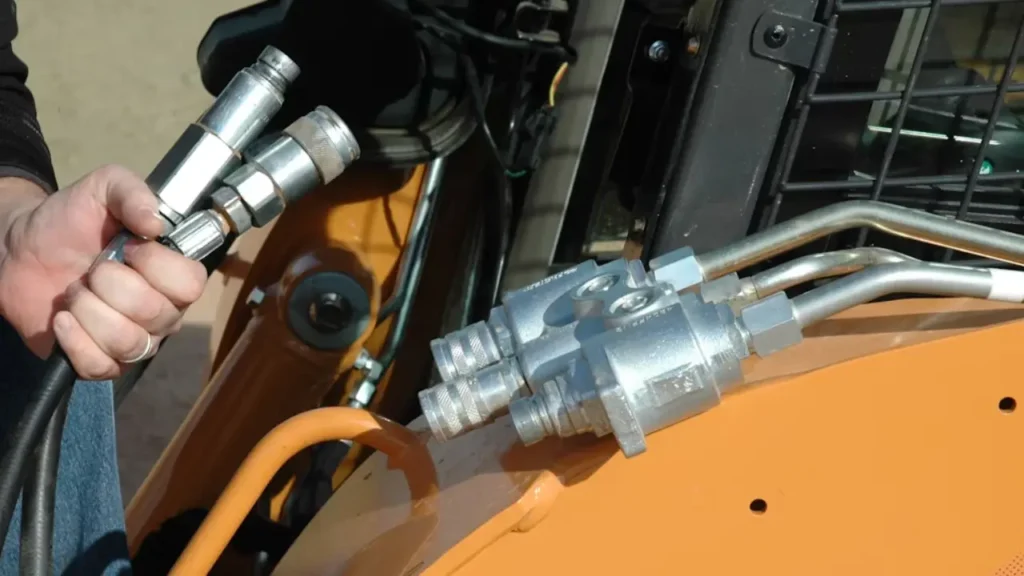
Connect the Hose to the Bobcat: Insert the male end of the hydraulic hose into the female fitting on the Bobcat. Push the hose firmly until it snaps into place.
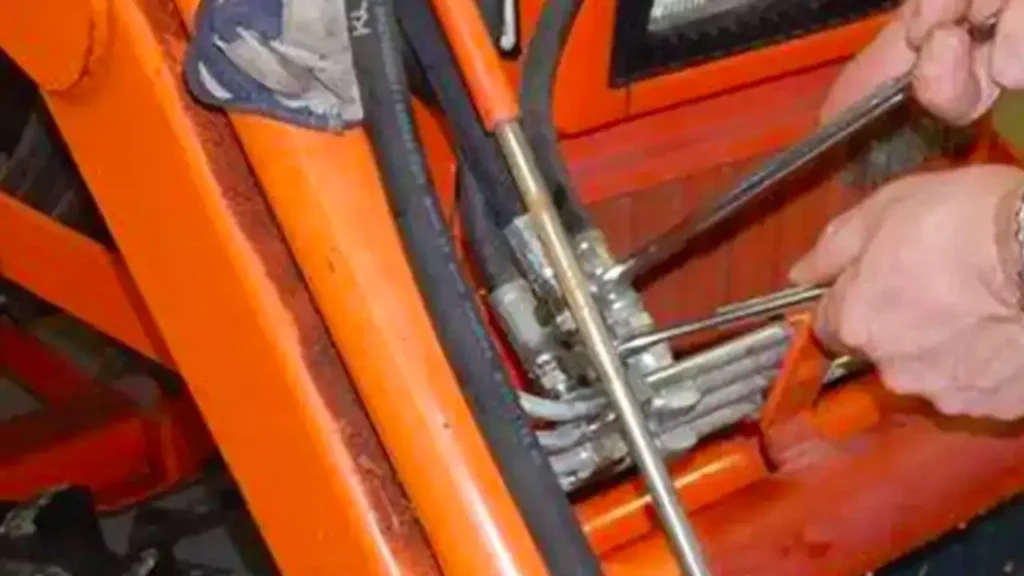
Secure the Connection: Once the hose is inserted, tighten the coupling nut on the fitting securely using a wrench. Make sure the nut is tightened evenly to prevent leaks.
Repeat for Remaining Hoses: Repeat the process for any remaining hydraulic hoses that need to be connected to the Bobcat.
3. Checking for Leaks
Start the Engine: Start the Bobcat engine and allow the hydraulic system to pressurize.
Inspect for Leaks: Carefully inspect all of the hose connections for any signs of leaks. If you see any leaks, tighten the couplings or replace the hose as necessary.
4. Completing the Attachment
Secure the Hoses: Once you have confirmed that there are no leaks, secure the hydraulic hoses using the appropriate clamps or straps to prevent them from moving or rubbing against other components.
Restart the Bobcat: Restart the Bobcat engine and test the hydraulic functions to ensure that all of the hoses are working properly.
How to Attach Hydraulic Hoses to Skid Steer
Skid steer attachment hydraulic hose is a relatively simple process, but it’s important to follow the correct steps to ensure a secure and leak-free connection. Here’s a detailed guide on how to do it:
1. Preparing for Attachment
Shut Down and Release Pressure: Turn off the skid steer engine and engage the parking brake. Then, locate the hydraulic pressure release valve and follow the manufacturer‘s instructions to release any residual pressure in the hydraulic system. This is crucial to prevent accidental fluid discharge and injuries.
Identify the Correct Connections: Locate the attachment points on the skid steer and the corresponding fittings on the hydraulic hoses. Ensure that the hose fittings match the attachment points on the skid steer.
Clean the Connection Points: Use a clean, lint-free cloth to wipe down the attachment points on the skid steer and the fittings on the hydraulic hoses. This will remove any dirt or debris that could interfere with the connection.
2. Attaching the Hoses
Connect the Hose to the Skid Steer: Insert the male end of the hydraulic hose into the female fitting on the skid steer. Push the hose firmly until it snaps into place.
Secure the Connection: Once the hose is inserted, tighten the coupling nut on the fitting securely using a wrench. Make sure the nut is tightened evenly to prevent leaks.
Repeat for Remaining Hoses: Repeat the process for any remaining hydraulic hoses that need to be connected to the skid steer.
3. Checking for Leaks
Start the Engine: Start the skid steer engine and allow the hydraulic system to pressurize.
Inspect for Leaks: Carefully inspect all of the hose connections for any signs of leaks. If you see any leaks, tighten the couplings or replace the hose as necessary.
4. Completing the Attachment
Secure the Hoses: Once you have confirmed that there are no leaks, secure the hydraulic hoses using the appropriate clamps or straps to prevent them from moving or rubbing against other components.
Restart the Skid Steer: Restart the skid steer engine and test the hydraulic functions to ensure that all of the hoses are working properly.
How to Attach Hydraulic Hoses to Tractor
Attaching hydraulic hoses to a tractor is a relatively simple process, but it’s important to follow the correct steps to ensure a secure and leak-free connection. Here’s a detailed guide on how to do it:
1. Preparing for Attachment
Shut Down and Release Pressure: Turn off the tractor engine and engage the parking brake. Then, locate the hydraulic pressure release valve and follow the manufacturer‘s instructions to release any residual pressure in the hydraulic system. This is crucial to prevent accidental fluid discharge and injuries.
Identify the Correct Connections: Locate the attachment points on the tractor and the corresponding fittings on the hydraulic hoses. Ensure that the hose fittings match the attachment points on the tractor.
Clean the Connection Points: Use a clean, lint-free cloth to wipe down the attachment points on the tractor and the fittings on the hydraulic hoses. This will remove any dirt or debris that could interfere with the connection.
2. Attaching the Hoses
Connect the Hose to the Tractor: Insert the male end of the hydraulic hose into the female fitting on the tractor. Push the hose firmly until it snaps into place.
Secure the Connection: Once the hose is inserted, tighten the coupling nut on the fitting securely using a wrench. Make sure the nut is tightened evenly to prevent leaks.
Repeat for Remaining Hoses: Repeat the process for any remaining hydraulic hoses that need to be connected to the tractor.
3. Checking for Leaks
Start the Engine: Start the tractor engine and allow the hydraulic system to pressurize.
Inspect for Leaks: Carefully inspect all of the hose connections for any signs of leaks. If you see any leaks, tighten the couplings or replace the hose as necessary.
4. Completing the Attachment
Secure the Hoses: Once you have confirmed that there are no leaks, secure the hydraulic hoses using the appropriate clamps or straps to prevent them from moving or rubbing against other components.
Restart the Tractor: Restart the tractor engine and test the hydraulic functions to ensure that all of the hoses are working properly.
Conclusion
In conclusion, proper attachment of hydraulic hoses is crucial for the safe and efficient operation of any hydraulic system. By following the guidelines outlined in this blog post, you can ensure leak-free connections, minimize the risk of failure, and extend the lifespan of your hoses. Remember to always consult the manufacturer‘s instructions and consider using specialized tools for optimal results.
Ready to upgrade your hydraulic system with high-quality hoses? Contact our hose factory today for a wide selection of wholesale hydraulic hoses at competitive prices. We offer expert advice and can help you choose the right hoses for your specific application. Visit our website or call us for a free quote.