There’s nothing more frustrating than getting ready to fire up your grill or propane heater, only to find you have low or no gas flow. We’ve all been there, wondering, “How do you unclog a propane hose?” While a true “clog” within the hose itself is actually quite rare, many issues can mimic a blockage.
In this comprehensive guide, we’ll walk you through our proven methods for diagnosing and resolving common propane flow problems, ensuring your appliances are running smoothly and safely again.
What is a Propane Hose?
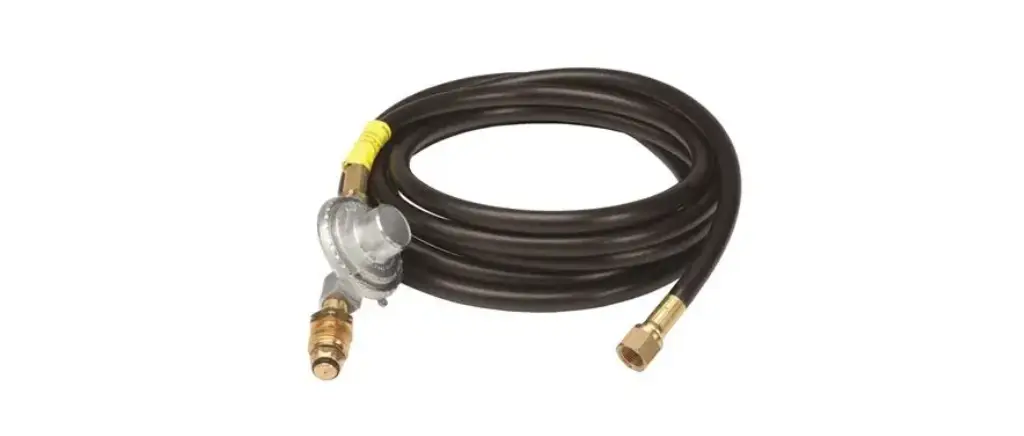
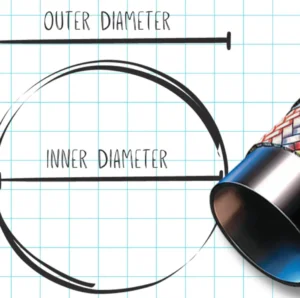
A propane hose is a flexible, durable conduit designed to safely transport propane gas from a tank to appliances such as grills, heaters, or stoves. Constructed with materials resistant to pressure, temperature, and chemical exposure, it ensures secure and reliable gas flow while preventing leaks and potential hazards.
Propane hoses typically feature reinforced inner tubing, protective outer covers, and threaded fittings for secure connections. They come in various lengths, diameters, and pressure ratings to match different appliances and applications. Proper selection, installation, and maintenance are crucial to ensure safe operation and long-term hose performance.
Understanding Propane Flow Issues
When our propane appliance isn’t getting gas, our first thought often jumps to a “clogged” hose. However, we’ve learned through experience that a true internal blockage in a propane hose is highly uncommon. Propane is a clean-burning fuel, and the pressure within the line typically prevents solid debris from accumulating inside the hose itself. More often, the problem lies elsewhere in the system, creating the illusion of a clog.
Common Misconceptions About “Clogs”
It’s easy to assume a solid obstruction, like dirt or rust, is blocking your propane hose. Yet, the design and pressure of propane systems make this unlikely. The gas flows under significant pressure, usually pushing any small particles through. The real culprits are typically external factors or safety features designed to prevent gas leaks, which can inadvertently restrict flow. Understanding this distinction is the first step toward effectively troubleshooting and resolving the problem.
Symptoms of Restricted Propane Flow
Before we dive into solutions, it’s helpful to recognize the signs that indicate a propane flow issue. We often encounter symptoms such as:
- Low flame or inconsistent flame: Your burner might light but produce only a small, weak flame, or it might flicker and go out.
- No ignition at all: The appliance simply won’t light, even after repeated attempts.
- Hissing sound without ignition: You might hear gas, but it doesn’t ignite, suggesting air or very low pressure.
- Appliance lights briefly, then goes out: This can indicate the propane system’s safety features kicking in due to low flow.
- Pilot light won’t stay lit: For appliances with pilot lights, this is a common indicator of insufficient gas supply.
Safety First: Essential Precautions Before You Begin
Whenever we’re dealing with propane, safety is our absolute top priority. Propane is highly flammable, and mishandling it can lead to dangerous situations. Before we even think about touching the hose or connections, we always take critical precautions. Skipping these steps could put you, your property, and others at serious risk. Never underestimate the importance of these initial safety measures.
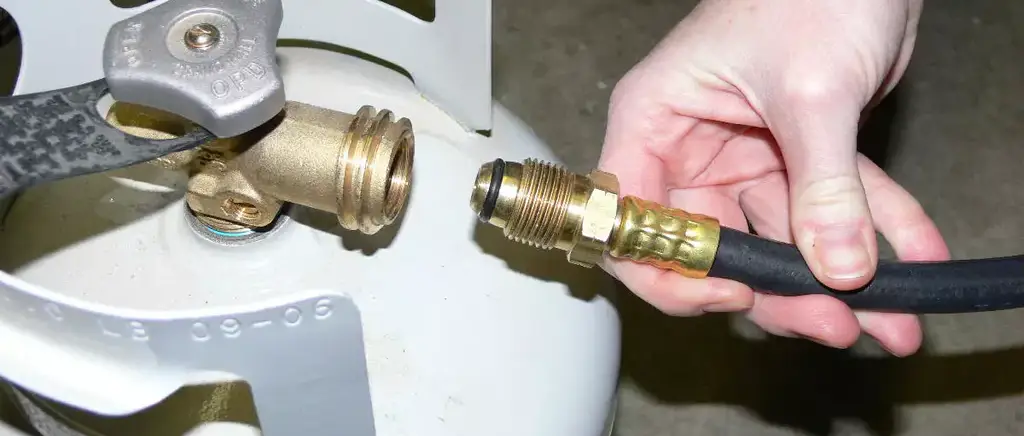
Disconnecting Your Propane Tank Safely
The very first thing we do is ensure the propane tank valve is completely shut off. We turn the valve clockwise until it’s snug. Next, we carefully disconnect the hose from both the tank and the appliance. This ensures that no gas can flow through the system while we are inspecting or working on it. Even if you only suspect a minor issue, this step is non-negotiable for safety.
Working in a Well-Ventilated Area
Propane is heavier than air, so if there’s any leakage, it will settle in low areas. We always ensure we’re working outdoors or in a very well-ventilated space. This allows any residual gas to dissipate safely, minimizing the risk of buildup and potential ignition. Never attempt to troubleshoot propane issues in an enclosed space like a basement or garage without proper ventilation.
No Open Flames or Ignition Sources
This might seem obvious, but it’s worth reiterating. While working with propane lines, we ensure there are no open flames, sparks, or any potential ignition sources nearby. This includes cigarettes, lighters, matches, and even electrical devices that could produce a spark. Our focus is entirely on the task at hand, away from distractions that could lead to an accident.
Troubleshooting the Most Common Causes of Low or No Flow
Once we’ve taken all the necessary safety precautions, we can begin troubleshooting. From our experience, the problem rarely lies in a physically clogged hose. Instead, issues with gas flow are almost always due to activation of safety features, insufficient tank pressure, or minor obstructions at the connection points. We tackle these most frequent culprits first, as they are often the quickest and easiest to resolve.
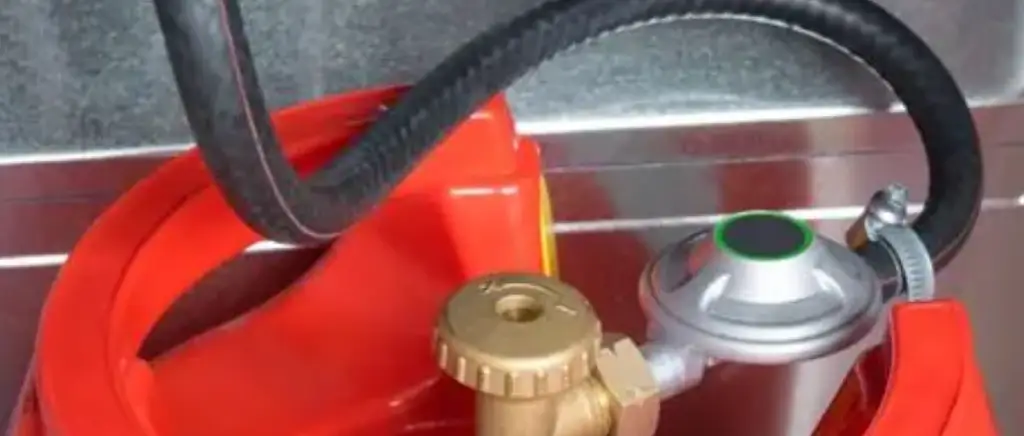
The OPD (Overfill Protection Device) – The Most Frequent Culprit
One of the most common reasons for low or no propane flow is the Overfill Protection Device (OPD) in your propane tank. This crucial safety feature prevents tanks from being overfilled, but it can also activate unexpectedly, restricting gas flow.
How the OPD Works
The OPD is designed to limit the flow of propane if it detects a sudden, large surge in demand or if the tank is opened too quickly. This is intended to prevent uncontrolled gas releases, but it often kicks in if you open the tank valve too fast, or if an appliance is left on when the tank is first opened. When activated, it significantly reduces or stops the flow of propane, mimicking a “clog.”
Resetting the OPD
If we suspect the OPD has been activated, here’s our simple reset procedure:
- Turn off all propane appliance valves (grill burners, furnace, etc.).
- Turn the propane tank valve completely OFF (clockwise).
- Wait 5-10 minutes. This allows the OPD to reset fully.
- Slowly open the propane tank valve, turning it counter-clockwise. Open it all the way but do so very gradually, taking about 5-10 seconds to open it fully. This slow opening is key to preventing the OPD from activating again.
- Now, turn on one appliance burner (e.g., on your grill) to its highest setting. Wait about 30 seconds for the gas to flow, then try to ignite it. It might take a couple of attempts to push any remaining air out of the line.
Checking Your Propane Tank Level
This might seem obvious, but we’ve often found ourselves scratching our heads only to realize the simplest answer was the correct one: the tank is empty! A low or empty tank will, of course, lead to no gas flow.
Why an Empty Tank Mimics a Clog
When your tank is nearly empty, the pressure inside drops significantly. This low pressure can mimic a clog, as there isn’t enough force to push the propane through the hose and into your appliance effectively. Always check your tank level before diving into more complex troubleshooting.
Weight vs. Gauge: Tips for Checking
- For smaller tanks (like 20lb grill tanks): The easiest way to check is to disconnect it and carefully lift it. If it feels very light, it’s likely empty or nearly empty. A full 20lb tank weighs about 37-40 lbs (20 lbs of propane + ~17-20 lbs for the tank).
- For larger tanks or if you want more precision: Use a propane tank gauge. These can be liquid level gauges (which float inside the tank) or pressure gauges (which measure vapor pressure). While pressure gauges aren’t perfectly accurate for liquid level, a very low reading indicates an empty tank.
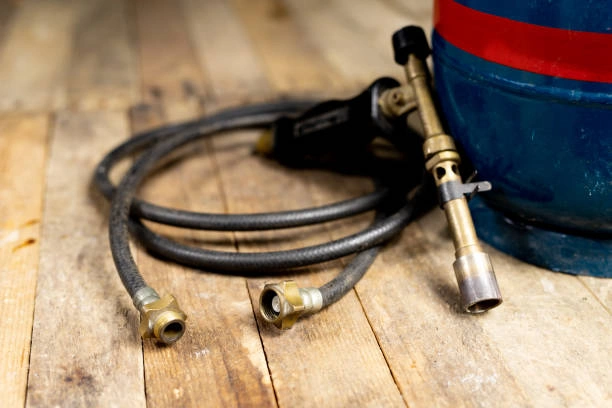
Inspecting Regulator Functionality
The propane regulator is a crucial component that reduces the high pressure from the tank to a usable pressure for your appliances. If the regulator is faulty, it can severely restrict gas flow, again appearing like a clogged hose.
Signs of a Faulty Regulator
- Very low flames, even after resetting the OPD.
- Popping or humming noises coming from the regulator.
- Visible cracks or damage to the regulator itself.
- Gas smell near the regulator (in which case, shut off the tank immediately and call a professional).
Regulator Vent Holes
Most regulators have small vent holes that allow atmospheric pressure to help regulate the gas flow. We ensure these holes are clear of debris, dirt, or insect nests. A blocked vent hole can prevent the regulator from functioning correctly, leading to reduced gas flow. Gently clean them with a soft brush, but never poke anything into the vent hole, as this could damage the internal diaphragm.
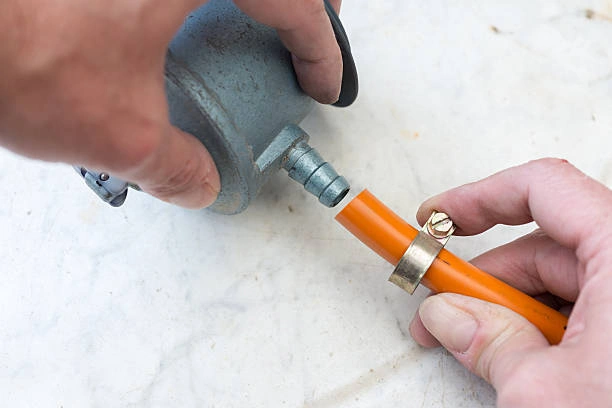
Kinks and Bends in the Hose
The simplest physical obstruction can be the culprit. A severely kinked or bent hose can restrict gas flow just as effectively as an internal blockage.
Visual Inspection for Physical Obstructions
We always perform a thorough visual inspection of the entire length of the hose. Look for:
- Sharp bends or kinks: Especially where the hose connects to the tank or appliance, or if it’s been stored improperly.
- Heavy objects resting on the hose: Ensure nothing is crushing it.
- Twists or knots: Untwist and straighten the hose carefully.
Simply repositioning the hose to remove a kink can often resolve the “clog” instantly.
Why Unclogging Propane Hoses?
Unclogging propane hoses is crucial for maintaining safe and efficient appliance operation. Blockages can reduce gas flow, cause uneven heating, or create dangerous pressure buildup. Regular cleaning ensures reliable fuel delivery, prevents potential leaks, and extends hose lifespan, helping avoid costly replacements and minimizing safety risks in residential or industrial propane systems.
- Restore Proper Gas Flow – A clogged hose restricts propane delivery, causing appliances to perform poorly or unevenly. Clearing blockages ensures consistent pressure and flame output, allowing grills, heaters, or stoves to operate at optimal efficiency. Regular maintenance prevents performance issues and keeps devices running smoothly.
- Prevent Pressure Buildup – Obstructions in the hose can create dangerous pressure accumulation, increasing the risk of hose rupture or leaks. By unclogging the line, you reduce internal stress and ensure the system operates within safe pressure limits, protecting both users and connected equipment.
- Enhance Safety – Propane blockages can lead to unexpected gas leaks, flame flashbacks, or appliance malfunctions. Proper hose cleaning reduces these risks by maintaining a clear and secure gas path. Safe, obstruction-free hoses are essential for preventing accidents in homes, outdoor areas, or industrial sites.
- Extend Hose Lifespan – Regular unclogging prevents material stress and chemical buildup inside the hose. Cleaning reduces internal wear and degradation, preserving structural integrity. This proactive approach prolongs hose life, minimizes the need for frequent replacements, and maintains consistent performance over time.
- Maintain Appliance Efficiency – Appliances connected to clogged hoses may consume more fuel or fail to reach desired temperatures. Ensuring a clear propane flow optimizes combustion efficiency and energy use. Clean hoses support better performance, cost savings, and overall system reliability in daily operation.
How Do You Unclog a Propane Hose?
A clogged propane hose can restrict gas flow, reduce appliance performance, and create potential safety risks. Blockages may result from debris, oil buildup, insect nests, or internal hose deterioration. Proper cleaning requires caution and the right tools. Follow these structured steps carefully to restore safe and efficient propane flow.
Tools Needed
- Adjustable wrench
- Soft brush
- Compressed air source
- Pipe cleaner or flexible cleaning brush
- Mild soapy water solution
- Clean dry cloth
- Safety gloves
- Safety goggles
Step 1: Turn Off and Disconnect the Propane Supply
Before starting, completely shut off the propane tank valve and ensure all connected appliances are turned off. Allow any remaining gas in the line to dissipate naturally. Never attempt cleaning while the hose is pressurized, as escaping gas can create serious fire hazards.
Use an adjustable wrench to disconnect the hose from the propane tank and appliance carefully. Work in a well-ventilated outdoor area away from open flames or sparks. Wear gloves and goggles to protect yourself from accidental gas release or debris exposure during removal.
Step 2: Inspect the Hose for Visible Blockages
Carefully examine both ends of the hose for dirt, insect nests, rust flakes, or oily residue. Shine a light through the hose to check for visible obstructions. Identifying the blockage type helps determine whether simple cleaning is sufficient or replacement is necessary.
Gently flex the hose while inspecting for cracks, brittleness, or internal collapse. If the hose feels unusually soft, brittle, or damaged, do not attempt cleaning. Structural weakness combined with blockage may indicate the hose should be replaced instead of reused.
Step 3: Clear the Obstruction Safely
Insert a flexible pipe cleaner or soft brush into the hose to loosen debris carefully. Avoid sharp or metal objects that could puncture or damage the inner lining. Slow, gentle movements help remove buildup without harming the hose’s internal structure.
After loosening debris, use compressed air to blow through the hose from one end to the other. Maintain moderate pressure to avoid damaging the lining. Continue until airflow is clear and unrestricted, ensuring no remaining particles block propane passage.
Step 4: Clean and Test for Leaks
Wipe the hose ends clean and reconnect it securely to the propane tank and appliance. Tighten fittings properly without over-tightening, which can damage threads or seals. Ensure all connections are stable before restoring propane flow for testing.
Slowly open the propane valve and apply a mild soapy water solution to all connections. Watch closely for bubbles, which indicate leaks. If bubbles appear, immediately shut off the gas and retighten fittings before retesting to ensure safe operation.
Best Practices for Propane Hose Care
Proper propane hose care is essential for maintaining safe gas flow and preventing leaks or unexpected failures. Regular inspection, correct storage, and careful handling significantly extend service life. By following simple preventive measures, you can reduce safety risks, avoid costly replacements, and ensure your propane appliances operate efficiently and reliably.
- Inspect Hoses Regularly – Check propane hoses frequently for cracks, brittleness, abrasion, or loose fittings. Pay close attention to connection points where stress is highest. Early detection of surface wear or minor leaks helps prevent sudden rupture, gas loss, and potentially dangerous fire hazards during operation.
- Avoid Excessive Bending and Twisting – Propane hoses should never be sharply bent, kinked, or twisted during installation or use. Excessive mechanical stress weakens the internal lining and reinforcement layers. Maintaining proper bend radius and straight routing preserves structural integrity and ensures consistent, unrestricted gas flow.
- Store in a Cool, Dry Location – When not in use, store propane hoses away from direct sunlight, moisture, and extreme temperatures. UV exposure and heat accelerate rubber aging and cracking. A dry, shaded storage environment prevents premature deterioration and maintains hose flexibility over time.
- Keep Away from Chemicals and Oils – Contact with harsh chemicals, solvents, or petroleum-based products can degrade hose materials. Avoid placing hoses near fuel spills or cleaning agents. Preventing chemical exposure reduces material breakdown and helps maintain safe performance during extended use.
- Replace Aging Hoses Promptly – Even without visible damage, propane hoses have a limited service life. Replace hoses that show stiffness, discoloration, or persistent leaks. Timely replacement ensures safe operation, minimizes fire risk, and protects connected appliances from inconsistent gas supply or pressure loss.
Conclusion
Dealing with an apparent “clog” in your propane hose can be frustrating, but as we’ve explored, the solution often lies in simple troubleshooting and preventative measures.
By understanding how your propane system works, performing regular inspections, and practicing basic precautions, you can ensure safe, efficient, and uninterrupted gas delivery for all your outdoor cooking and heating activities. Remember, if you have questions about propane safety or complex issues, always consult a qualified professional.