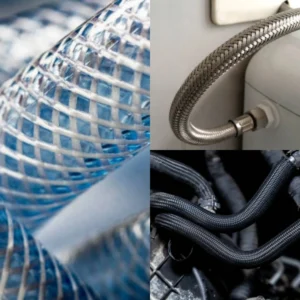
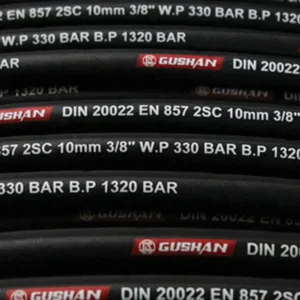
Hydraulic hoses are essential components in many industrial and mobile equipment applications. Proper installation is crucial to ensure optimal performance, safety, and longevity.
This step-by-step guide will walk you through the process of installing hydraulic hoses, from selecting the right hose to securing the fittings.
How to Install Hydraulic Hose

Hydraulic hose installation is a critical task that requires precision and attention to detail. Here’s a detailed guide to ensure a safe and effective installation:
Step 1. Planning and Preparation
- Identify the Right Hose: Ensure the hose is compatible with the fluid, pressure, and temperature requirements of your system.
- Gather Necessary Tools: Prepare the following tools: hose cutter, crimping tool, lubricant, leak detection solution, torque wrench, and wrenches.
- Clean the Work Area: Remove any debris or contaminants that could compromise the installation.
Step 2. Cutting the Hose
- Use a Specialized Cutter: Employ a high-quality hose cutter designed for the specific type of hose you’re working with.
- Square Cut: Ensure a clean, square cut to prevent premature hose failure.
- Deburr the Cut End: Remove any burrs or sharp edges from the cut end of the hose to avoid damaging the fitting.
Step 3. Preparing the Fittings
- Clean the Fittings: Thoroughly clean the fittings to remove any dirt, debris, or old sealant.
- Lubricate the Fittings: Apply a small amount of hydraulic fluid or a compatible lubricant to the fitting to facilitate insertion.
Step 4. Inserting the Fitting
- Alignment: Ensure the fitting is aligned correctly with the hose end.
- Insertion: Gently insert the fitting into the hose, ensuring it’s fully seated.
- Avoid Over-Insertion: Over-inserting the fitting can damage the hose and affect the crimp.
Step 5. Crimping the Fitting
- Choose the Right Die: Select the appropriate crimping die for the specific fitting and hose size.
- Proper Crimp: Use a hydraulic crimping tool to apply the correct amount of force to the fitting, ensuring a tight and secure connection.
- Inspect the Crimp: Visually inspect the crimp for any defects or irregularities. A well-crimped fitting will have a uniform and tight connection.
Step 6. Routing the Hydraulic Hose
- Avoid Sharp Bends: Excessive bending can weaken the hose and restrict fluid flow.
- Secure the Hose: Use hose clamps or straps to secure the hose to the equipment, preventing it from moving and getting caught.
- Protect the Hose: Shield the hose from potential damage by using protective covers or routing it away from heat sources and sharp edges.
Step 7. Connecting the Hose
- Align the Fittings: Ensure the fittings are aligned correctly before connecting them to the hydraulic system.
- Tighten the Fittings: Use a torque wrench to tighten the fittings to the specified torque value. Overtightening can damage the fittings and hose.
- Check for Leaks: After connecting the hose, inspect all connections for leaks. Use a leak detection solution to identify any potential issues.
Step 8. Bleeding the System
- Purge the Air: Bleed the hydraulic system to remove any air pockets that may have been introduced during installation.
- Operate the Equipment: Operate the equipment to ensure proper fluid flow and system performance.
Remember to always follow the manufacturer‘s instructions for specific hose and fitting installation procedures. If you’re unsure about any step, consult a qualified hydraulic technician.
By following these guidelines, you can ensure a safe and effective hydraulic hose installation.
What is the Correct Way to Install a Hydraulic Hose Assembly
Disclaimer: Installing hydraulic hose assemblies can be complex and potentially dangerous. It’s crucial to follow the specific instructions provided by the manufacturer and to have the necessary tools and expertise. If you’re unsure about any step, it’s best to consult with a qualified hydraulic technician.
Here’s a general guideline for installing a hydraulic hose assembly:
Prepare the Hose:
- Measure and Cut: Accurately measure the required length of the hose and cut it using a specialized hose cutter. Ensure a clean, perpendicular cut.
- Select Fittings: Choose the appropriate fittings based on the hose size, pressure rating, and application.
- Lubricate Fittings: Apply a suitable lubricant to the fitting threads to facilitate smooth assembly.
Assemble the Fittings:
- Insert the Hose: Carefully insert the hose into the fitting, ensuring it’s fully seated.
- Crimp the Fitting: Use a hydraulic crimping machine to crimp the fitting onto the hose, securing it tightly. Follow the manufacturer‘s instructions for the specific crimping procedure.
Install the Hose Assembly:
- Route the Hose: Carefully route the hose assembly, avoiding sharp bends, excessive stress, and potential hazards.
- Connect the Fittings: Connect the hose assembly to the hydraulic system components, ensuring a secure and leak-free connection.
- Bleed the System: After installation, bleed the hydraulic system to remove any air bubbles.
Important Safety Considerations:
- Pressure Relief: Always relieve system pressure before working on hydraulic components.
- Eye Protection: Wear safety glasses to protect your eyes from potential debris and hydraulic fluid.
- Proper Tools: Use the correct tools for cutting, crimping, and tightening fittings.
- Manufacturer‘s Instructions: Follow the specific instructions provided by the hose and fitting manufacturer.
- Regular Inspection: Regularly inspect hydraulic hose assemblies for signs of wear, damage, or leaks.
Remember: Improper installation of hydraulic hose assemblies can lead to serious accidents and equipment damage. Always prioritize safety and seek professional assistance if needed.
How Tight Should Hydraulic Hoses Be
Hydraulic hose fittings should be tightened to the manufacturer’s specified torque. This torque value is crucial to ensure a proper seal without over-tightening, which can damage the fitting or the hose itself.
If you don’t have a torque wrench or the manufacturer‘s specific torque value:
- Hand-tighten: Initially, hand-tighten the fitting until it feels snug.
- Additional Quarter Turn: Once hand-tight, add an additional quarter turn.
- Avoid Over-tightening: Over-tightening can damage the fitting or the hose, leading to leaks or complete failure.
Always consult the hydraulic hose manufacturer’s instructions for the specific type of fitting and hose assembly you are working with.
Remember: It’s better to err on the side of slightly under-tightening than over-tightening. If a fitting leaks after initial tightening, add another quarter turn, but be cautious not to exceed the manufacturer‘s recommended torque.
Conclusion
Proper hydraulic hose installation is crucial for the safe and efficient operation of your equipment. By following these step-by-step guidelines, you can ensure a secure and reliable installation. Remember to prioritize safety, accuracy, and quality throughout the process.
Ready to upgrade your hydraulic system with top-quality hoses? Contact us today for a customized quote on our extensive range of wholesale hydraulic hoses. Our expert team is ready to assist you in selecting the perfect hose for your specific needs.


