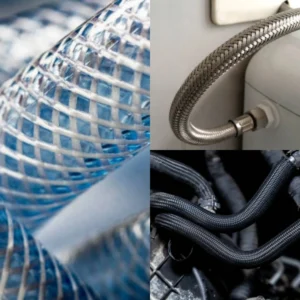
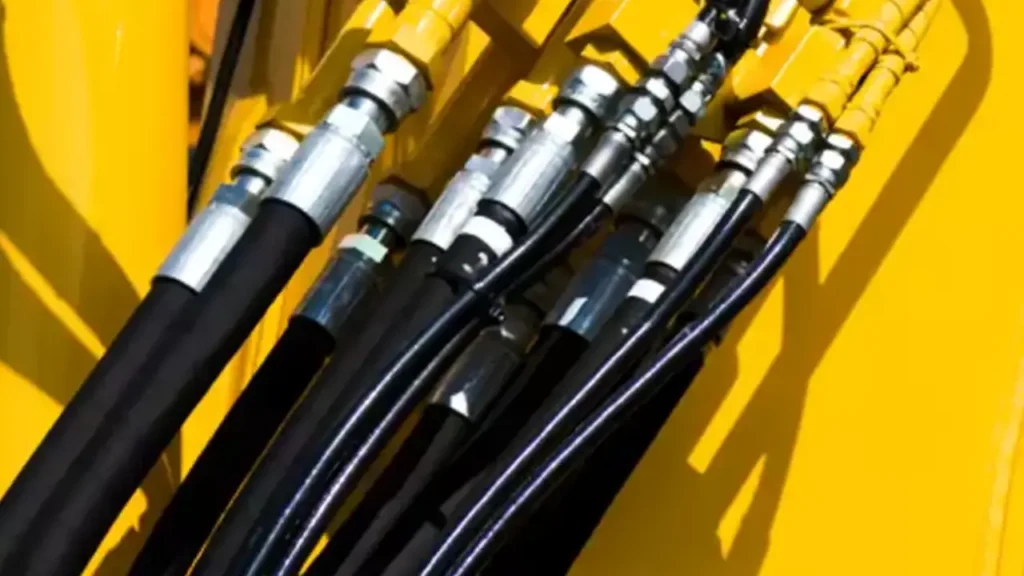
Properly hooking up hydraulic hoses to your tractor is essential for efficient and safe operation. A well-connected hydraulic system ensures smooth functioning of various attachments and implements.
In this guide, we’ll walk you through the steps involved in connecting hydraulic hoses to your tractor, providing clear instructions and safety tips. Whether you’re a seasoned farmer or a novice, this guide will help you master the process.
Why Hooking Up Hydraulic Hoses
Hooking up hydraulic hoses correctly is essential for safe and efficient fluid transfer in hydraulic systems. Proper connections prevent leaks, maintain system pressure, and ensure smooth operation. Incorrectly installed hoses can lead to equipment damage, fluid loss, and safety hazards, making proper installation critical for reliable hydraulic performance.
- Maintain System Pressure – Correct hose connections to ensure hydraulic systems operate at their intended pressure. Properly seated hoses prevent leaks, maintain consistent fluid flow, and protect pumps, valves, and cylinders from pressure drops or overloading, ensuring efficient and reliable system performance.
- Prevent Leaks and Spills – Properly hooking up hoses prevents hydraulic fluid leaks that could damage equipment, create unsafe working conditions, or contaminate the environment. Secure connections ensure safe operation and reduce maintenance costs and downtime.
- Ensure Equipment Longevity – Correct hose installation reduces stress, bending, and vibration on hydraulic components. This minimizes wear and tear, extending the service life of hoses, fittings, and connected machinery while maintaining smooth system operation.
- Enhance Safety – Proper hose connections protect operators and equipment from sudden bursts, leaks, or high-pressure fluid exposure. Correct installation reduces the risk of accidents and ensures compliance with workplace safety standards.
- Optimize System Efficiency – Hooking up hoses properly ensures smooth fluid flow, reduces energy loss, and prevents performance issues. Well-connected hoses maintain optimal hydraulic efficiency, reliability, and responsiveness across industrial, construction, and mobile applications.
How to Hook Up Hydraulic Hoses on a Tractor?
Hooking up hydraulic hoses on a tractor correctly is essential for safe and efficient operation of implements and attachments. Proper connections prevent leaks, maintain system pressure, and ensure smooth performance. Following step-by-step procedures and using the right tools ensures reliable, long-lasting hydraulic operation for tractors and agricultural machinery.
Tools Needed
- Safety gloves and goggles
- Clean rags or cloth
- Hydraulic hose wrenches
- Tractor-compatible fittings and connectors
- Hydraulic fluid
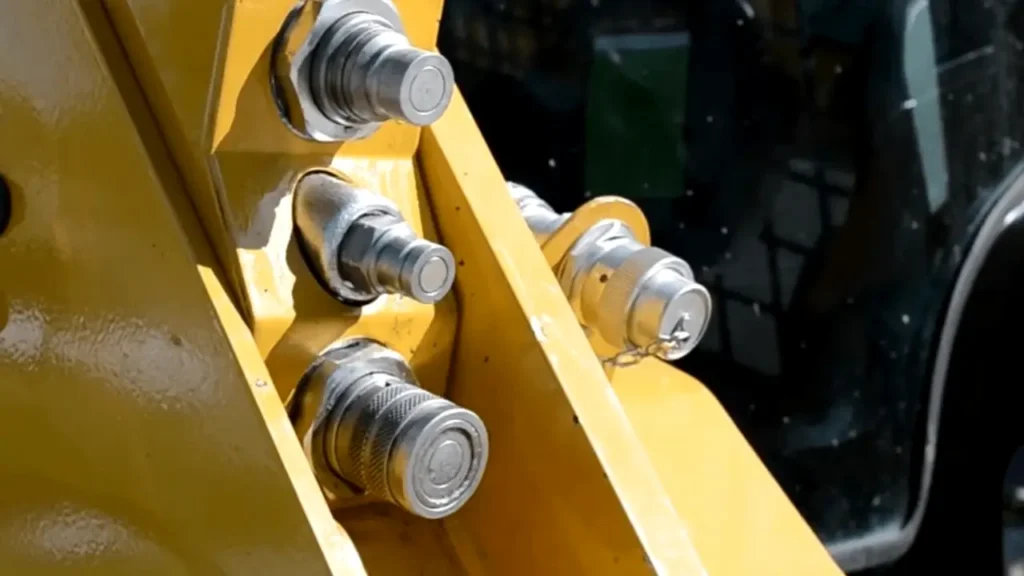
Step 1: Identify Hydraulic Hose Connections
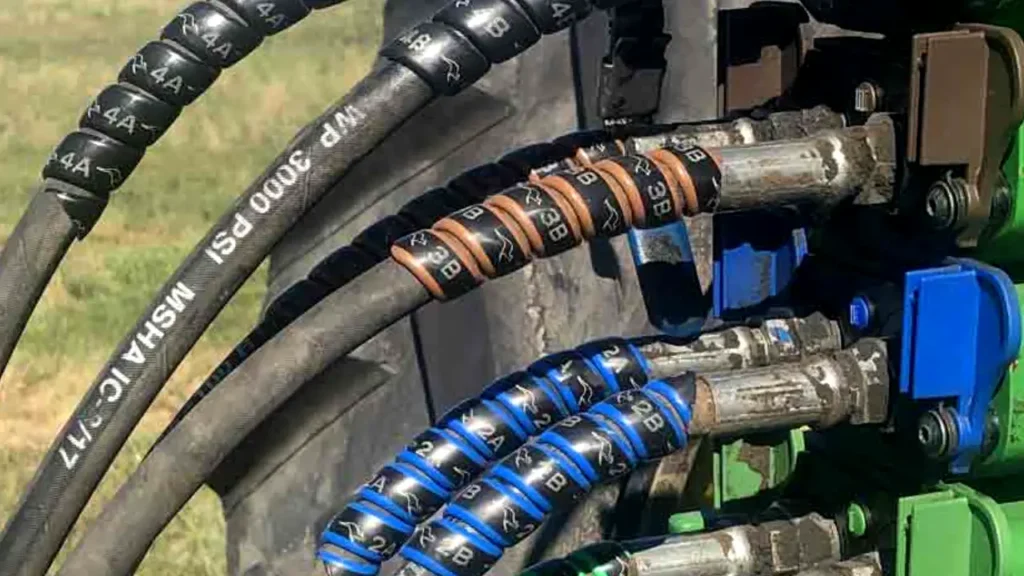
Identify the hydraulic ports on the tractor and matching connections on the implement. Correctly labeling or color-coding hydraulic hoses helps prevent mismatched connections, which can cause leaks, reverse operation, or system damage. Accurate identification ensures proper flow direction and safe hydraulic function.
Double-check the tractor and implement manuals to confirm port functions. Ensuring correct hydraulic hose connection points minimizes mistakes during hookup, prevents potential hydraulic failures, and allows smooth, reliable operation of attachments such as loaders, mowers, or backhoes.
Step 2: Clean Hydraulic Hoses and Ports
Wipe all hydraulic hose ends and tractor ports with a clean rag to remove dirt, debris, or contaminants. Clean surfaces prevent debris from entering the hydraulic system, reducing the risk of damage and ensuring leak-free, reliable operation.
Inspect hydraulic hoses for wear or damage before connecting. Cleaning and checking hydraulic hose connections protects the hydraulic system, maintains fluid cleanliness, and ensures proper sealing between hoses and tractor ports, promoting system longevity and performance.
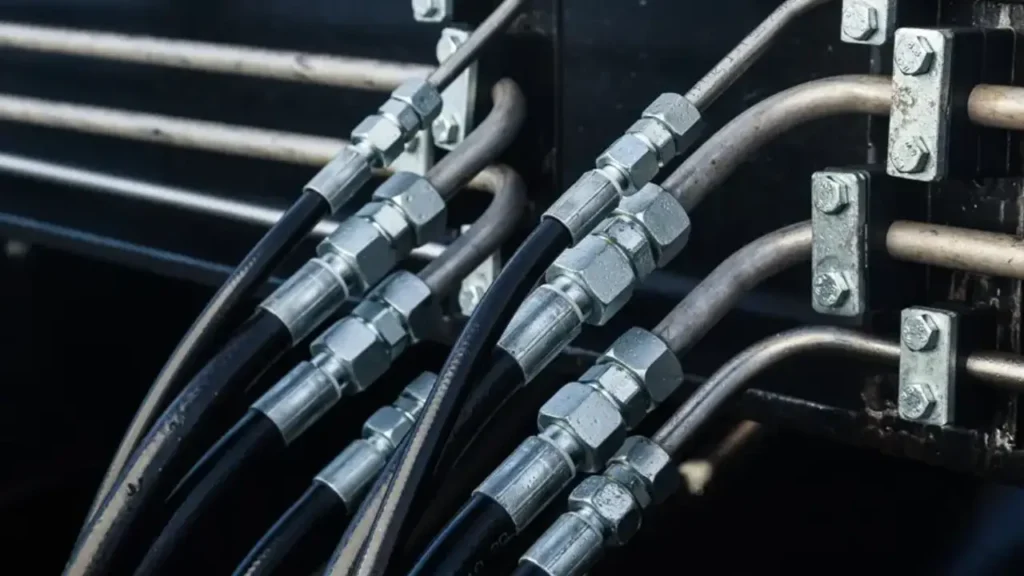
Step 3: Connect the Hydraulic Hoses
Insert the hydraulic hoses into the corresponding tractor ports and secure them with the proper fittings. Ensure the hoses are fully seated, aligned, and free of twists or kinks to maintain proper fluid flow.
Tighten fittings according to manufacturer recommendations, avoiding over- or under-tightening. Proper connection ensures leak-free hydraulic hose operation, reduces stress on hoses, and maintains consistent hydraulic pressure for safe and efficient implement control.
Step 4: Test the Hydraulic Hoses
After hooking up, start the tractor and slowly operate the hydraulic system at low pressure. Check the hydraulic hoses for leaks, unusual sounds, or abnormal movement in the implement to verify correct connections.
Observe hydraulic hoses and fittings under normal operating conditions. Testing allows detection of loose connections, minor leaks, or misaligned hydraulic hoses before full operation, ensuring safety, preventing equipment damage, and maintaining smooth hydraulic performance.
Step 5: Secure and Route Hydraulic Hoses Properly
Route hydraulic hoses to avoid sharp bends, pinch points, or areas with excessive vibration. Use clamps or brackets to secure hydraulic hoses and prevent rubbing against tractor or implement surfaces.
Proper routing and securing of hydraulic hoses extend hose life, reduce wear, and prevent accidental disconnections. Neatly arranged hydraulic hoses maintain system efficiency, prevent leaks, and ensure safe operation during long-term tractor and implement use.
How to Hook Up Hydraulic Hoses on a John Deere

Hooking up hydraulic hoses on a John Deere tractor correctly is essential for safe and efficient operation of implements and attachments. Proper connections prevent leaks, maintain system pressure, and ensure smooth performance.
Following step-by-step procedures and using the right tools ensures reliable, long-lasting hydraulic hose operation for John Deere tractors.
Tools Needed
- Safety gloves and goggles
- Clean rags or cloth
- Hydraulic hose wrenches
- John Deere-compatible fittings and connectors
- Hydraulic fluid
Step 1: Identify Hydraulic Hose Connections
Locate the hydraulic ports on your John Deere tractor and match them with the implement connections. Correctly labeling or color-coding hydraulic hoses prevents mismatched hookups that can cause leaks, reverse operation, or system damage. Accurate identification ensures proper flow direction and safe hydraulic function.
Double-check the John Deere tractor and implement manuals to confirm port functions. Ensuring correct hydraulic hose connection points minimizes mistakes during hookup, prevents hydraulic system failure, and allows smooth operation of attachments like loaders, mowers, or backhoes.
Step 2: Clean Hydraulic Hoses and Ports
Wipe all hydraulic hose ends and John Deere tractor ports with a clean rag to remove dirt, debris, or contaminants. Clean surfaces prevent debris from entering the hydraulic system, reducing damage risk and ensuring leak-free, reliable operation.
Inspect hydraulic hoses for wear or damage before connecting. Cleaning and checking hydraulic hose connections protects the hydraulic system, maintains fluid cleanliness, and ensures proper sealing between hoses and tractor ports for optimal performance and longevity.
Step 3: Connect the Hydraulic Hoses
Insert the hydraulic hoses into the corresponding John Deere tractor ports and secure them with the proper fittings. Ensure the hoses are fully seated, aligned, and free of twists or kinks to maintain proper fluid flow.
Tighten fittings according to manufacturer specifications, avoiding over- or under-tightening. Proper connection ensures leak-free hydraulic hose operation, reduces stress on hoses, and maintains consistent hydraulic pressure for safe and efficient implement control.
Step 4: Test the Hydraulic Hoses
After hooking up, start the John Deere tractor and slowly operate the hydraulic system at low pressure. Check the hydraulic hoses for leaks, unusual sounds, or abnormal movement in the implement to verify correct connections.
Observe hydraulic hoses and fittings under normal operating conditions. Testing allows detection of loose connections, minor leaks, or misaligned hydraulic hoses before full operation, ensuring safety, preventing equipment damage, and maintaining smooth hydraulic performance.
Step 5: Secure and Route Hydraulic Hoses Properly
Route hydraulic hoses to avoid sharp bends, pinch points, or areas with excessive vibration. Use clamps or brackets to secure hydraulic hoses and prevent rubbing against John Deere tractor or implement surfaces.
Proper routing and securing of hydraulic hoses extend hose life, reduce wear, and prevent accidental disconnections. Neatly arranged hydraulic hoses maintain system efficiency, prevent leaks, and ensure safe operation during long-term use of John Deere tractors and attachments.
How to Hook Up Hydraulic Hoses on a Skid Steer

Hooking up hydraulic hoses on a skid steer correctly is essential for safe and efficient operation of attachments like buckets, augers, or grapples. Proper connections prevent leaks, maintain system pressure, and ensure smooth performance. Following step-by-step procedures and using the right tools ensures reliable, long-lasting hydraulic hose operation for skid steer equipment.
Tools Needed
- Safety gloves and goggles
- Clean rags or cloth
- Hydraulic hose wrenches
- Skid steer-compatible fittings and connectors
- Hydraulic fluid
Step 1: Identify Hydraulic Hose Connections
Locate the hydraulic ports on your skid steer and match them with the attachment connections. Properly labeling or color-coding hydraulic hoses prevents mismatched hookups, which can cause leaks, reverse function, or system damage. Correct identification ensures proper flow direction and safe hydraulic operation.
Double-check the skid steer and attachment manuals to confirm port functions. Correct hydraulic hose connection points minimize installation errors, prevent hydraulic failures, and allow smooth, reliable operation of attachments such as buckets, augers, or forks.
Step 2: Clean Hydraulic Hoses and Ports
Wipe all hydraulic hose ends and skid steer ports with a clean rag to remove dirt, debris, or contaminants. Clean surfaces prevent debris from entering the hydraulic system, reducing risk of damage and ensuring leak-free, reliable operation.
Inspect hydraulic hoses for wear, cracks, or damage before connecting. Cleaning and checking hydraulic hose connections protects the system, maintains fluid cleanliness, and ensures proper sealing between hoses and ports for optimal performance and longevity.
Step 3: Connect the Hydraulic Hoses
Insert the hydraulic hoses into the corresponding skid steer ports and secure them with the proper fittings. Ensure the hoses are fully seated, aligned, and free of twists or kinks to maintain proper fluid flow.
Tighten fittings according to manufacturer specifications, avoiding over- or under-tightening. Proper connection ensures leak-free hydraulic hose operation, reduces stress on hoses, and maintains consistent hydraulic pressure for safe and efficient attachment control.
Step 4: Test the Hydraulic Hoses
After hooking up, start the skid steer and slowly operate the hydraulic system at low pressure. Check the hydraulic hoses for leaks, unusual sounds, or abnormal movement in the attachment to verify correct connections.
Observe hydraulic hoses and fittings under normal operating conditions. Testing allows detection of loose connections, minor leaks, or misaligned hydraulic hoses before full operation, ensuring safety, preventing equipment damage, and maintaining smooth hydraulic performance.
Step 5: Secure and Route Hydraulic Hoses Properly
Route hydraulic hoses to avoid sharp bends, pinch points, or areas with excessive vibration. Use clamps or brackets to secure hydraulic hoses and prevent rubbing against skid steer or attachment surfaces.
Proper routing and securing of hydraulic hoses extend hose life, reduce wear, and prevent accidental disconnections. Neatly arranged hydraulic hoses maintain system efficiency, prevent leaks, and ensure safe operation during long-term skid steer and attachment use.
How to Hook Up Hydraulic Hoses on a Bobcat?
Hooking up hydraulic hoses on a Bobcat correctly is essential for safe and efficient operation of attachments such as buckets, augers, trenchers, or grapples. Proper connections prevent leaks, maintain system pressure, and ensure smooth performance. Following step-by-step procedures and using the right tools ensures reliable, long-lasting hydraulic hose operation for Bobcat equipment.
Tools Needed
- Safety gloves and goggles
- Clean rags or cloth
- Hydraulic hose wrenches
- Bobcat-compatible fittings and connectors
- Hydraulic fluid
Step 1: Identify Hydraulic Hose Connections
Locate the hydraulic ports on your Bobcat and match them with the attachment connections. Properly labeling or color-coding hydraulic hoses prevents mismatched hookups that can cause leaks, reversed functions, or system damage. Accurate identification ensures proper flow direction and safe hydraulic operation.
Double-check the Bobcat and attachment manuals to confirm port functions. Correct hydraulic hose connection points minimize installation errors, prevent hydraulic system failures, and allow smooth, reliable operation of attachments like buckets, augers, or grapples.
Step 2: Clean Hydraulic Hoses and Ports
Wipe all hydraulic hose ends and Bobcat ports with a clean rag to remove dirt, debris, or contaminants. Clean surfaces prevent debris from entering the hydraulic system, reducing the risk of damage and ensuring leak-free, reliable operation.
Inspect hydraulic hoses for wear, cracks, or damage before connecting. Cleaning and checking hydraulic hose connections protects the hydraulic system, maintains fluid cleanliness, and ensures proper sealing between hoses and ports for optimal performance and longevity.
Step 3: Connect the Hydraulic Hoses
Insert the hydraulic hoses into the corresponding Bobcat ports and secure them with the proper fittings. Ensure the hoses are fully seated, aligned, and free of twists or kinks to maintain proper fluid flow.
Tighten fittings according to manufacturer specifications, avoiding over- or under-tightening. Proper connection ensures leak-free hydraulic hose operation, reduces stress on hoses, and maintains consistent hydraulic pressure for safe and efficient attachment control.
Step 4: Test the Hydraulic Hoses
After hooking up, start the Bobcat and slowly operate the hydraulic system at low pressure. Check the hydraulic hoses for leaks, unusual sounds, or abnormal movement in the attachment to verify correct connections.
Observe hydraulic hoses and fittings under normal operating conditions. Testing allows detection of loose connections, minor leaks, or misaligned hydraulic hoses before full operation, ensuring safety, preventing equipment damage, and maintaining smooth hydraulic performance.
Step 5: Secure and Route Hydraulic Hoses Properly
Route hydraulic hoses to avoid sharp bends, pinch points, or areas with excessive vibration. Use clamps or brackets to secure hydraulic hoses and prevent rubbing against Bobcat or attachment surfaces.
Proper routing and securing of hydraulic hoses extend hose life, reduce wear, and prevent accidental disconnections. Neatly arranged hydraulic hoses maintain system efficiency, prevent leaks, and ensure safe operation during long-term Bobcat and attachment use.
Tips for Hooking Hydraulic Hoses
Tips for Hooking Hydraulic Hoses
Properly hooking hydraulic hoses is crucial for safe, efficient, and long-lasting operation of hydraulic systems. Correct installation prevents leaks, maintains system pressure, reduces wear on hoses and fittings, and ensures smooth operation of industrial, mobile, or agricultural equipment. Following best practices helps improve performance and minimizes maintenance issues.
- Label and Color-Code Hoses – Clearly labeling or color-coding hydraulic hoses prevents mismatched connections. This practice ensures fluid flows in the correct direction, reduces errors during installation, and improves safety, helping operators quickly identify and connect hoses to the correct ports.
- Inspect Hoses and Fittings – Before installation, check hydraulic hoses and fittings for wear, cracks, or damage. Inspecting components ensures proper sealing, reduces the risk of leaks, and protects the hydraulic system from contamination, extending hose life and maintaining system reliability.
- Clean Hoses and Ports – Wipe all hydraulic hose ends and system ports with a clean rag to remove dirt or debris. Clean connections prevent contaminants from entering the system, ensuring leak-free operation and reducing the risk of component damage.
- Avoid Twists and Kinks – Properly route hydraulic hoses to prevent twisting, sharp bends, or kinks. Maintaining a smooth, stress-free path preserves hose integrity, prevents leaks, and ensures consistent fluid flow, even under high pressure or movement conditions.
- Secure Hoses Properly – Use clamps, brackets, or hose guides to secure hydraulic hoses. Proper securing reduces vibration, friction, and wear, preventing accidental disconnections and ensuring hoses maintain their position for safe and efficient hydraulic system operation.
Conclusion
Hooking up hydraulic hoses on a tractor can be a straightforward task when done correctly. By following the steps outlined in this guide, you can ensure a secure and leak-free connection. Remember to prioritize safety, use the right tools, and consult your tractor’s manual for specific instructions.
Need high-quality hydraulic hoses for your next project?
Gushan Rubber offers a wide range of wholesale hydraulic hoses to meet your specific needs. Our hoses are built to withstand demanding conditions and ensure optimal performance.
Contact us today to learn more about our products and services.